Selling products online requires more than just great inventory. Your images serve as the primary connection between your brand and potential customers, replacing the in-person experience of touching and examining products. Learning to take e-commerce photos effectively can significantly improve conversion rates, reduce returns, and build customer trust.
Whether you're launching a new online store or refining your existing visual strategy, mastering product photography fundamentals will set your business apart in an increasingly competitive marketplace.
Understanding E-Commerce Photography Requirements
Before diving into camera settings and lighting setups, you need to grasp what makes e-commerce photography different from other types of product shots. Online shoppers can't physically interact with your products, so your images must compensate for this limitation.
Platform-Specific Image Standards
Different marketplaces and platforms have specific requirements that directly affect how you should approach your photography. Amazon, for instance, requires a pure white background (RGB 255, 255, 255) for main product images, while Instagram shopping favors lifestyle-oriented shots that tell a story.
Key platform requirements typically include:
- Minimum resolution (usually 1000-2000 pixels on the longest side)
- Specific aspect ratios (1:1 for Instagram, variable for other platforms)
- File format specifications (JPEG most common, PNG for transparency)
- Background color requirements (white, transparent, or brand-specific)
- Product coverage within the frame (usually 85% minimum)
Understanding e-commerce image standards helps you plan shoots that work across multiple sales channels without requiring extensive reshooting.
The Role of Consistency in Product Photography
Consistency builds trust and professionalism. When shoppers browse your catalog, similar products should maintain the same lighting, angles, and styling approach. This uniformity helps customers compare items easily and creates a cohesive brand experience.
Creating a photography consistency framework involves documenting your lighting setups, camera positions, and post-processing workflows. Consider creating shot lists and style guides that your team can reference for every shoot.
Essential Equipment for E-Commerce Photography
You don't need a fortune to start taking professional e-commerce photos, but investing in the right equipment can significantly improve efficiency and quality.
Camera Options and Settings
While professional DSLRs and mirrorless cameras offer maximum control, modern smartphones can produce surprisingly good results for certain product categories. The key difference lies in manual control, lens quality, and low-light performance.
For serious e-commerce operations, consider these camera features:
- Manual mode capability for consistent exposure across all shots
- High megapixel count (20MP+) for detailed product images and cropping flexibility
- Tethered shooting support to view images on a larger screen during capture
- RAW file format for maximum editing flexibility
When learning to take photos for e-commerce, start with these fundamental camera settings: shoot in manual mode, use ISO 100-200 for minimal noise, set the aperture to f/8-f/16 for maximum product sharpness, and adjust the shutter speed to properly expose your scene. These settings provide a solid foundation you can adjust to your specific products and lighting conditions.
Lighting Equipment Fundamentals
Lighting represents the single most important factor in product photography quality. Natural window light can work for small-scale operations, but controlled artificial lighting provides consistency regardless of time of day or weather conditions.
Basic lighting kit components:
- Two or three continuous LED lights (5500K daylight balanced)
- Light diffusers or softboxes to eliminate harsh shadows
- Reflectors (white, silver, or gold) for filling shadows
- Light stands with adjustable height
- Backdrop support system for seamless backgrounds
The guide to light for product photography covers advanced techniques, but beginners should master three-point lighting first: a key light for main illumination, a fill light to soften shadows, and a back light to separate the product from the background.
Supporting Equipment That Makes a Difference
Beyond cameras and lights, several supporting tools dramatically improve your workflow and final results. A sturdy tripod eliminates camera shake and maintains consistent framing throughout your shoot. This becomes especially valuable when shooting product variations that need identical positioning.
Consider adding these to your toolkit:
- Tripod with center column for overhead flat lay shots
- Gray card for accurate white balance
- Invisible mannequins for apparel photography
- Product stands and props for creative styling
- Tethering cable to connect the camera to the computer
Setting Up Your E-Commerce Photo Studio
Creating a dedicated photography space, even a small corner of your warehouse or office, streamlines your workflow and ensures consistent results. This doesn't require a massive investment, just thoughtful organization.
Background Selection and Setup
Most e-commerce photography relies on clean, distraction-free backgrounds that let products shine. White seamless paper remains the industry standard because it's versatile, affordable, and meets most marketplace requirements.
A white background studio setup typically involves hanging a roll of white paper from a backdrop stand, allowing it to curve smoothly from vertical to horizontal, creating a seamless transition that eliminates visible corners or edges in your shots.
For products requiring different aesthetic approaches, explore these background alternatives:
- Textured surfaces (wood, marble, concrete) for lifestyle shots
- Colored backgrounds that complement your brand palette
- Transparent acrylic for reflection shots
- Custom-built sets that tell your brand story
Space Requirements and Organization
You need enough room to position your camera at an appropriate distance from the product while maintaining space for lighting equipment on both sides. For most small to medium products, a 10x10-foot area provides adequate working space.
Organize your studio into dedicated zones: a shooting area with backdrop and lights, a staging area for preparing products, and a review station with a computer for checking images immediately after capture. This workflow minimization reduces setup time between products and helps maintain focus during longer shooting sessions.
Mastering Product Photography Techniques
Understanding how to take photos for e-commerce means developing both technical skills and creative vision. Different products require different approaches, but certain fundamental techniques apply across categories.
The Standard Product Shot Sequence
Most e-commerce listings benefit from a specific image sequence that provides customers with comprehensive product information. According to best practices for e-commerce images, successful listings typically include five to seven images covering different angles and product details.
Essential shot types include:
- Hero shot (front view, centered, white backdrop)
- Angle views (45-degree perspectives showing depth)
- Back view (important for clothing and items with rear features)
- Detail shots (texture, stitching, materials, labels)
- Scale reference (product in use or size comparison)
- Packaging shot (shows what arrives in shipment)
- Lifestyle context (product in its intended environment)
Lighting Setups for Different Product Types
Reflective products like jewelry, electronics, and glassware require dramatically different lighting approaches than matte items such as clothing or wooden furniture. Shiny surfaces bounce light directly into the camera, creating hot spots and obscuring product details.
For reflective items, use large diffused light sources positioned at angles that bounce light away from the camera. Consider using a light tent or diffusion panels that surround the product. For textured products, side lighting emphasizes surface details and creates depth through controlled shadows.
The product photography tips from PayPal emphasize natural lighting techniques that work well for small businesses just starting out.
Composition and Framing Strategies
Where you position products within the frame affects visual appeal and meets technical requirements. Most platforms require products to occupy 80-90% of the frame, leaving minimal empty space around edges.
Apply the rule of thirds for lifestyle shots, placing key product elements along intersecting grid lines. For standard catalog images, center the product and ensure it's level with the camera. Shoot slightly wider than your final intended crop to allow flexibility during editing.
Styling and Presentation Strategies
How you present products before clicking the shutter significantly impacts their appeal. Styling transforms functional product documentation into compelling visual marketing.
Props and Context Without Distraction
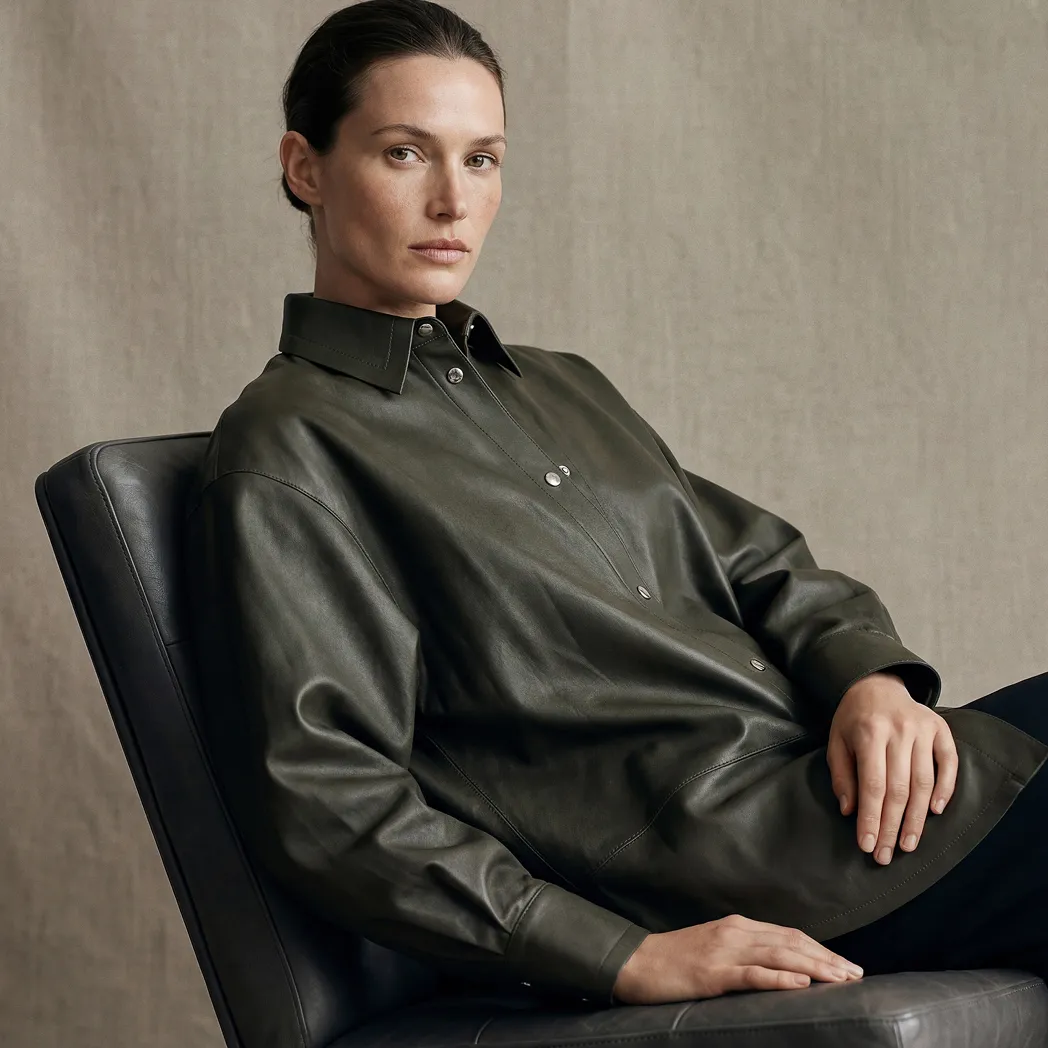
Props should enhance product understanding without stealing attention. A watch photographed on a wrist provides scale and context that a floating watch cannot. However, the hand shouldn't feature prominent jewelry or unusual nail colors that distract from the product.
Explore creative product styling photography ideas that balance creativity with commercial effectiveness. The goal is to make products aspirational while maintaining clarity about what customers receive.
Effective prop guidelines:
- Choose neutral colors that don't compete with the product
- Maintain props slightly out of focus to preserve product emphasis
- Use props that communicate product benefits or usage
- Keep prop selection consistent across similar product categories
Apparel-Specific Photography Approaches
Clothing presents unique challenges because fabrics drape, wrinkle, and fit differently across body types. You have several presentation options, each with distinct advantages.
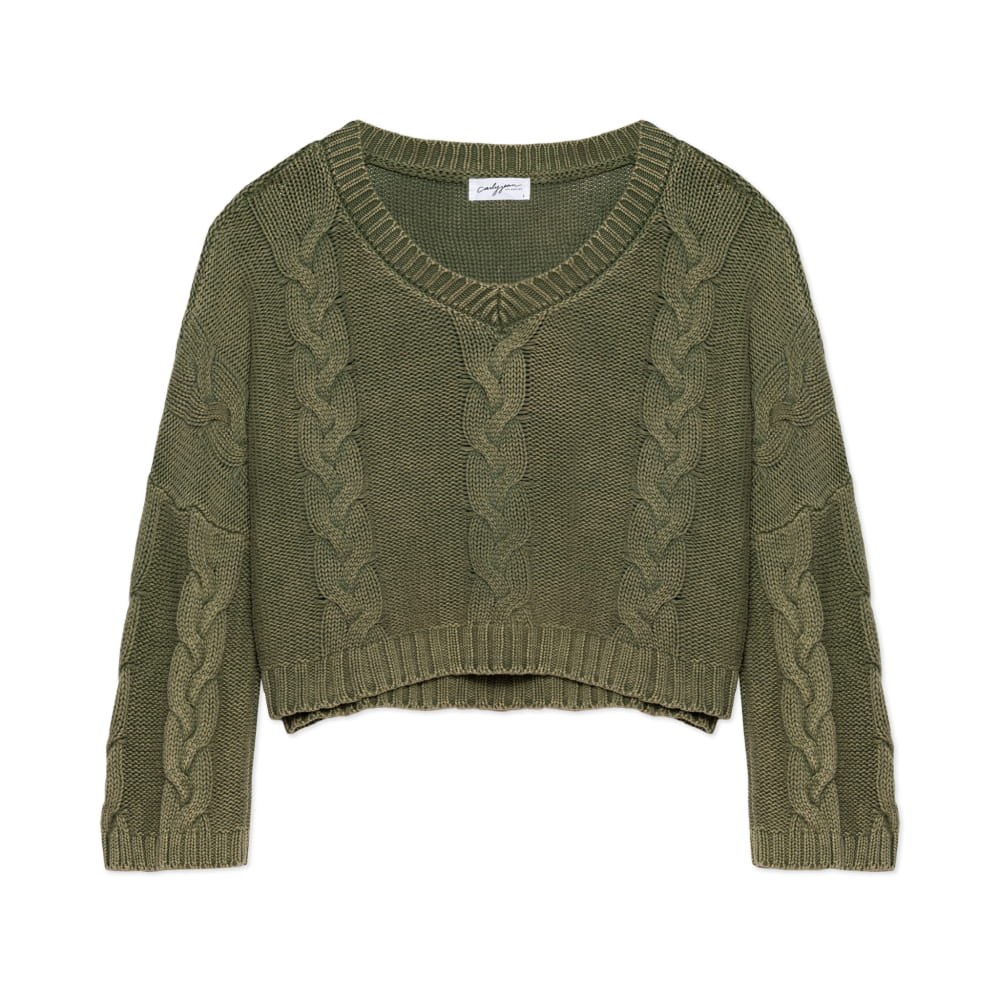
The choice between ghost mannequin vs flat lay photography depends on your product type and brand aesthetic. Ghost mannequin creates a three-dimensional appearance showing how garments fit on a body form, while flat lay offers a clean, editorial look ideal for Instagram-style marketing.


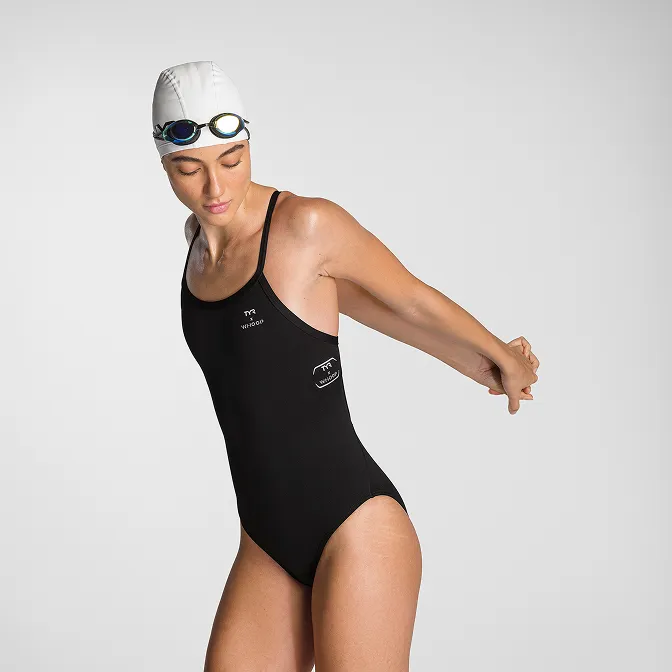
Model photography adds lifestyle appeal but requires additional coordination, higher costs, and potentially more returns if customers don't match the model's proportions. Many successful apparel brands combine approaches: mannequin shots for the main product image, flat lays for detail shots, and lifestyle model images for marketing campaigns.
Detail and Texture Capture
Close-up photography reveals material quality, craftsmanship, and features that wide shots can't communicate. Premium products particularly benefit from detail shots that justify higher price points.
The close-up product photography guide explains macro photography techniques, but you don't always need specialized macro lenses. Many cameras perform well in close-up scenarios when you maintain adequate distance and use appropriate apertures.
Focus stacking, where you combine multiple images shot at different focus points, creates impossibly sharp detail shots showing every texture element in crisp focus. This advanced technique works beautifully for jewelry, watches, and high-end accessories where customers want to examine every detail.
Post-Processing and Image Optimization
Raw images straight from the camera rarely represent the final product you'll upload to your store. Post-processing transforms good captures into polished, professional e-commerce images.
Basic Photo Editing Workflow
Develop a consistent editing workflow you can apply efficiently across large batches of products. Start with technical corrections (white balance, exposure, straightening) before moving to creative adjustments (contrast, saturation, sharpening).
Standard editing sequence:
- Import and cull images, keeping only the best shots
- Adjust white balance using the gray card reference
- Correct exposure and recover highlights/shadows
- Straighten and crop to the required dimensions
- Remove dust spots and minor imperfections
- Apply consistent color grading across the series
- Sharpen appropriately for web display
- Export at optimized file sizes
The complete guide to product photo retouching covers advanced techniques like frequency separation and color correction that elevate image quality while maintaining authentic product representation.
Background Removal and Replacement
Many e-commerce platforms require pure white backgrounds or transparent files for product images. While shooting on white seamless paper gives you a head start, you'll typically need to refine the backgrounds in post-processing to meet the RGB 255, 255, 255 specification.
Background removal can be handled manually with Photoshop selection tools or automatically via AI-powered services. For high-volume operations, automated solutions save significant time, though manual refinement often yields better results for complex products with intricate edges, such as jewelry or hair products.
File Formatting and Optimization
Large, high-resolution files may look stunning, but create slow-loading product pages that hurt conversion rates and SEO performance. The product image optimization guide explains balancing quality with file size.
Aim for JPEG files between 100-250KB for standard product images, achieving this through appropriate compression during export. Use progressive JPEGs that load incrementally, showing a low-resolution version quickly while higher quality fills in. For images requiring transparency, the PNG format becomes necessary despite larger file sizes.
Specialized Product Categories
Different product types demand specific photography approaches. Understanding these nuances helps you adapt your technique to showcase each item optimally.
Photographing Reflective and Transparent Items
Glass, chrome, and polished surfaces reflect everything around them, including your camera, lights, and studio environment. Managing these reflections requires specialized techniques.
Create a "white world" around reflective products using large diffusion panels or a complete light tent. This technique bounces soft, even light from all directions, eliminating harsh reflections while maintaining the product's reflective qualities. For transparent items like glassware, backlighting creates dimension and reveals clarity.
When shooting beverages for e-commerce, you'll need to control condensation, manage liquid levels precisely, and often use stand-ins during setup to preserve the actual product for final shots when lighting is perfected.
Fashion and Apparel Photography
Clothing photography requires attention to fit, drape, and styling that communicates both the garment's design and its real-world wearability. The clothing photography guide addresses common challenges like wrinkles, inconsistent sizing display, and color accuracy across different fabric types.
Steaming garments before shooting eliminates wrinkles and creates clean lines. Pin garments from behind to create an ideal fit when using mannequins. For flat-lay shots, use minimal styling to maintain the garment's authentic appearance and make it visually appealing.
Beauty and Cosmetics Photography
Beauty products combine several challenging elements: reflective packaging, small size requiring detail shots, and accurate color representation that customers rely on for shade matching. Beauty product photography must balance aesthetic appeal with functional accuracy.
Shoot multiple angles showing the product's size, packaging details, texture (for creams and powders), and color accuracy. Include shots with the packaging open to show the actual product inside. For makeup, consider including swatches across different skin tones to help customers make confident purchasing decisions.
Scaling Your E-Commerce Photography Operation
As your business grows, photography demands increase. You'll need systems that maintain quality while efficiently handling higher volumes.
Batch Shooting Strategies
When photographing multiple products in a session, maintain consistent camera settings and lighting throughout. This allows you to apply the same editing adjustments across entire batches, dramatically reducing post-processing time.
Set up your studio with all the products for one category readily accessible. Shoot all front views first, then all angle shots, then all detail shots. This approach minimizes lighting adjustments and maintains workflow momentum. E-commerce photography tips include creating shot lists and checklists that prevent missing critical angles during high-volume sessions.
When to Consider Professional Services
The decision between handling photography in-house versus outsourcing depends on several factors, including volume, product variety, internal resources, and quality requirements. The in-house vs outsourced product photography analysis helps evaluate which approach suits your specific situation.
Small businesses launching with limited product ranges often benefit from learning how to take photos for e-commerce themselves initially. However, as catalogs expand beyond 50-100 SKUs, or when product launches require tight deadlines, professional services deliver consistency and speed that's difficult to match internally.
Professional studios like Squareshot bring specialized equipment, experienced photographers familiar with different product challenges, and streamlined workflows developed through thousands of shoots. They also maintain consistent output quality even when shooting hundreds of products in compressed timeframes.
Building an Image Library System
Organize your growing image library with clear naming conventions and metadata that make finding specific shots simple months or years later. Include product SKU, view type, and date in filenames. Use digital asset management software to tag images with searchable attributes.
Common Mistakes to Avoid
Even experienced photographers fall into certain traps when shooting product images. Recognizing these pitfalls helps you avoid quality issues that reduce conversions.
Frequent photography mistakes include:
- Inconsistent lighting creates color variations across similar products
- Insufficient resolution limits where images can be used effectively
- Over-editing that misrepresents the actual product's appearance
- Poor focus, especially on the most important product features
- Distracting backgrounds that compete with the product for attention
- Inaccurate colors are causing returns when products don't match expectations
- Missing detail shots that leave the customer with unanswered questions
Additionally, forgetting to shoot images in your product's actual size and scale can confuse customers. Always include size references or measurements in at least one image to set proper expectations.
Mastering e-commerce photography combines technical skills, creative vision, and systematic workflow management. Whether you're shooting your first product or your thousandth, applying these principles consistently delivers images that inform customers, build brand credibility, and drive sales.
When your photography needs exceed internal capacity or require specialized expertise, Squareshot delivers professional product photography with a focus on quality, consistency, and timely delivery across catalog, creative, and model shoots.
Product A
SQUARE SHOT