E-commerce fashion photography is now one of the highest-leverage investments a clothing brand can make. With online retail more competitive than ever and shoppers making split-second decisions without being able to touch, try, or feel a garment, your product images aren't just visuals — they're your sales team.
A blurry shot or flat lighting doesn't just look unprofessional; it costs you the sale. Done right, fashion photography for e-commerce communicates fabric texture, true fit, and brand identity in a single frame — reducing returns, building trust, and turning browsers into buyers. Whether you're building a catalog from scratch or finally leveling up your existing imagery, this guide covers everything you need to know heading into 2026.
Understanding the Foundations of Fashion Product Photography
E-commerce fashion photography isn't just editorial work with a shopping cart attached. It has a different job to do — one that's equal parts aspirational and functional. A shopper can't pick up the fabric, check the stitching, or try anything on. Your images have to do all of that for them.
The shots that convert consistently tend to do five things well:
- Represent colors, textures, and proportions accurately — no nasty surprises when the order arrives
- Stay visually consistent across the full catalog so customers can compare products confidently
- Highlight the details that justify the price: stitching, pattern repeats, fabric weight
- Load fast without losing the clarity shoppers need to make a decision
- Look professional enough to build trust the moment someone lands on the page
The tension most brands run into is between creative expression and catalog consistency. Editorial-style shots build brand identity — but if every product page looks like a different shoot, customers lose confidence. The strongest e-commerce photography does both: it has a clear brand point of view and a reliable, consistent visual system underneath it.
Studio Setup Essentials
You don't need a massive budget to build a solid e-commerce photography setup, but you do need to think it through before you start shooting. Trying to retrofit your studio mid-catalog is expensive and time-consuming. Getting the foundation right up front saves you both.
Here's a practical breakdown of what different budget levels actually get you:

The right setup doesn't just produce better-looking images — it makes every part of the process faster, from shooting to editing to publishing. It also ensures your images meet the e-commerce image standards that platforms expect and that shoppers have come to demand.
Lighting Techniques That Transform Fashion Images
If there's one variable that separates professional e-commerce photography from everything else, it's lighting. Get it wrong, and even premium fabrics look flat and cheap. Get it right, and you're communicating texture, dimension, and quality before a shopper reads a single product detail.
Natural vs. Artificial Light
Natural light has genuine appeal — it's soft, organic, and free. For small brands shooting occasional content in a bright space, window light can absolutely work. But it's inconsistent by nature. Clouds roll in, the sun shifts, the season changes. What looked great on Tuesday's shoot looks nothing like Friday's.
Professional e-commerce photography runs on artificial studio lighting for straightforward reasons:
- You control the intensity, direction, and quality — every single time
- Results are consistent whether it's overcast or sunny, 8 AM or 8 PM
- You can recreate an exact setup weeks or months later
- Predictable lighting means faster shoots and cleaner post-production
Most established fashion brands use a hybrid approach: studio lighting as the backbone for all catalog content, with natural light reserved for lifestyle and social content where a looser, more editorial feel makes sense.
Key Light Positioning
Where you place your main light source changes everything about how a garment reads on camera. For standard catalog work, a large softbox at a 45-degree angle is the workhorse setup — it creates enough shadow to show fabric texture without going dramatic or moody.
But different materials need different treatment. Silk and chiffon come alive with backlighting that catches their translucency. Denim and wool need more directional, contrast-forward light to make their weight and texture legible. There's no universal setup — the garment tells you what it needs.
Fill lights handle the other side of the equation: they knock back harsh shadows and keep detail visible in the darker areas of the frame. A good rule of thumb is to position your fill opposite the key light at roughly half the intensity — enough to open up the shadows without flattening the image entirely.
Styling and Creative Direction That Actually Moves Product
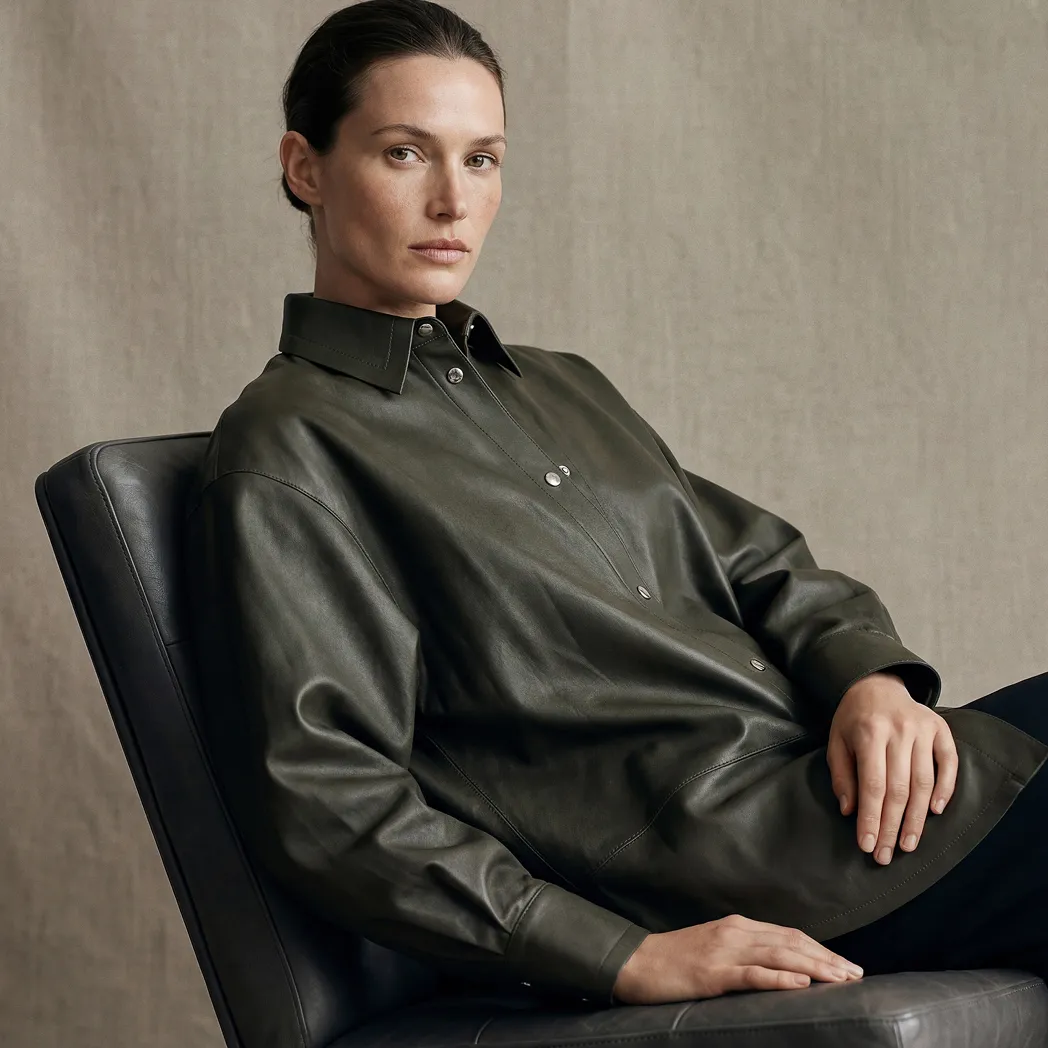
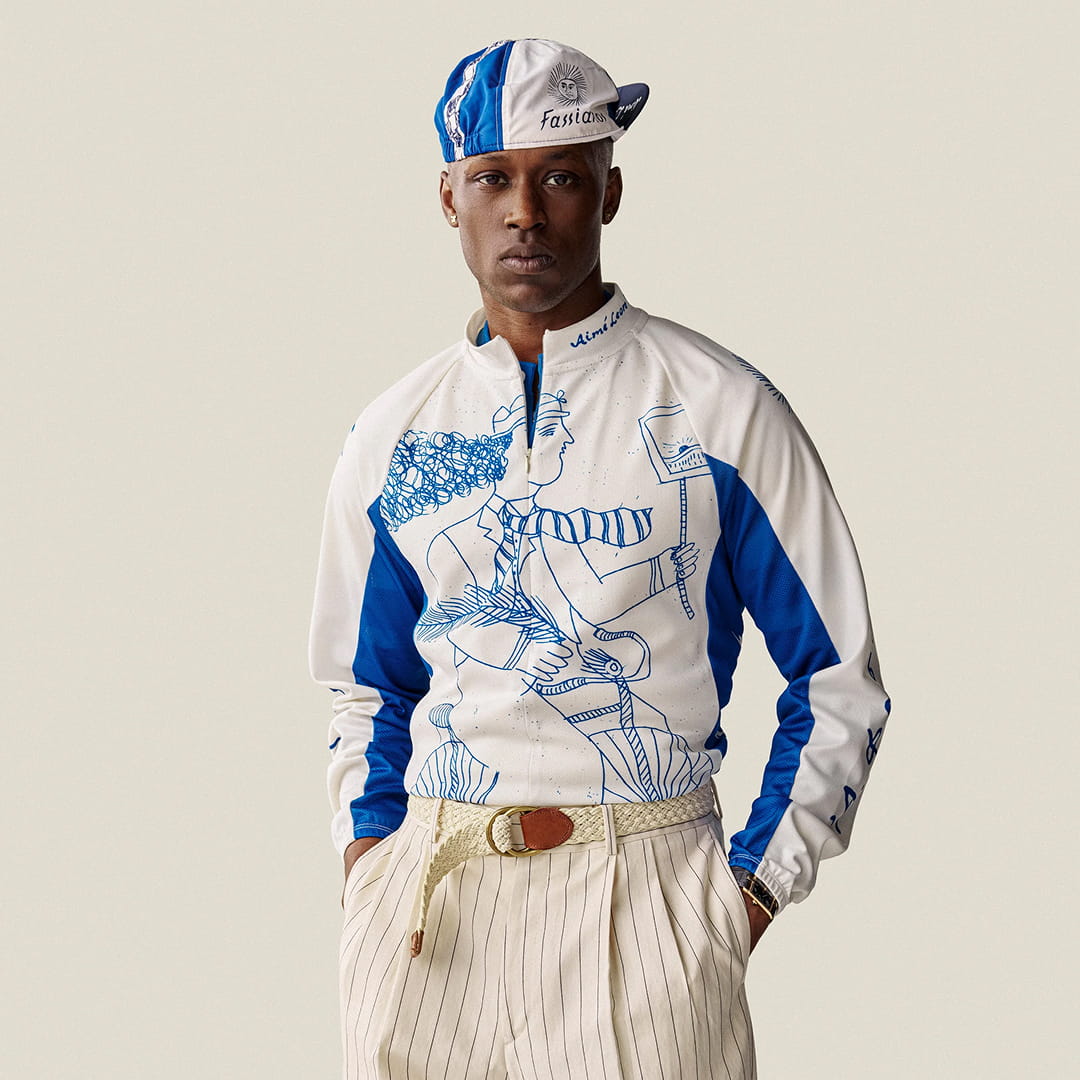
Even technically perfect images fall flat if the styling doesn't connect with the people you're selling to. Every creative call you make — who's wearing the clothes, how they're standing, what's in the background — shapes how a shopper feels about your brand before they've read a single word of copy.
Getting Model Selection and Posing Right
The model is your customer proxy. When shoppers see someone who looks like them wearing your product, the mental leap from "this is nice" to "I want this" gets a lot shorter. In 2026, representing a range of body types, ages, and backgrounds isn't a differentiator anymore — it's table stakes. Brands that still default to one narrow look are leaving conversions on the table.
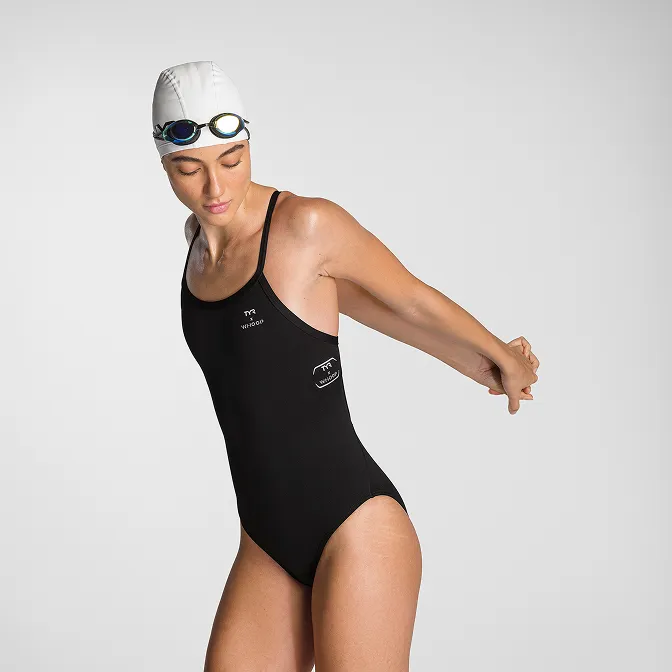
Posing-wise, natural beats editorial almost every time in e-commerce. Stiff, high-fashion poses look great in a campaign but can actually undermine trust when a shopper is trying to answer a practical question: how will this fit me? Direct your models to move — a mid-stride shot, a relaxed turn, a candid moment. You get images that show how the fabric actually drapes and moves, which is exactly what reduces return rates.
The shots that tend to work hardest:
- Three-quarter turns that reveal garment structure and silhouette
- Movement shots that show fabric drape and flow
- Detail close-ups on stitching, texture, or hardware
- Full front, back, and side views for complete coverage


Squareshot's styling team handles all of this in-house — so you're not coordinating between a photographer, a separate stylist, and a model agency. It's one brief, one shoot, done.
Backgrounds: When to Keep It Clean, When to Add Context
White backgrounds are still the default for good reason. They meet platform requirements, keep the focus on the product, and make catalog consistency effortless. If you're selling on Amazon, Shopify, or any major marketplace, a clean white or light neutral is the reliable foundation.
But ghost mannequin and flat lay shots on white alone don't tell a brand story. Lifestyle backgrounds — a loft, a street corner, a spare bedroom — help shoppers picture your product in their actual lives, and that emotional context drives engagement. The risk is backgrounds that compete with the garment rather than frame it. The rule of thumb: if a shopper's eye goes to the background before the clothing, something's off.
Most brands benefit from a mix: clean studio shots for PDPs and marketplaces, lifestyle imagery for social and editorial placements. Squareshot's background selection guide breaks down how to match background choices to your brand positioning — and their clothing product photography services are built around getting that balance right from the start.
Technical Specifications and Image Requirements
Great fashion photography that doesn't meet platform specs is great photography that doesn't get used. Technical requirements vary by platform, but a few standards apply everywhere — and building your workflow around them from the start saves you from expensive reshoots later.
Resolution and File Size
The goal is simple: shoot big, deliver smart. High-resolution images let shoppers zoom in and actually examine what they're buying — that detail is what closes the gap between uncertainty and purchase. Most platforms want a minimum of 2000px on the longest side, but shooting larger gives you flexibility for future use.
File size is always a trade-off:
- Larger files mean more detail and quality retained
- Smaller files load faster — and page speed directly affects conversion
- Compression reduces size but introduces artifacts if overdone
- Format choice (JPEG vs. PNG vs. WebP) affects both quality and load time
The standard professional workflow: shoot at maximum quality, keep archival masters, export optimized versions for web. This e-commerce product image size guide breaks down exactly what that looks like in practice.
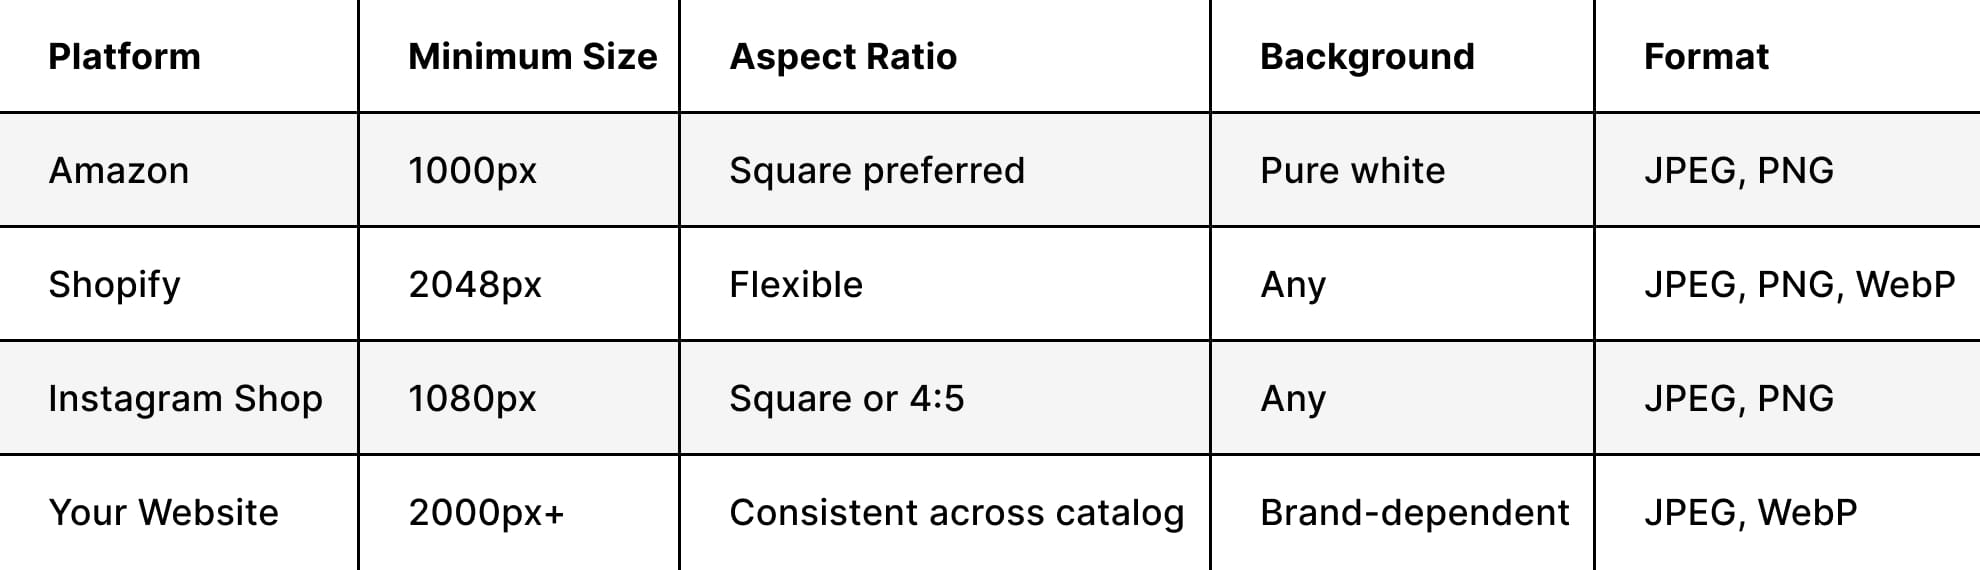
Platform Requirements at a Glance
Every platform has its own rules. Build your shot list around these before you shoot, not after:
Shooting Styles That Drive Conversions
No single photography style does every job. The brands with the strongest visual presence use a mix — each style optimized for a specific part of the customer journey.
Ghost Mannequin Photography
Ghost mannequin — also called invisible mannequin or hollow man — is the technique where garments are shot on a mannequin, then the form is removed in post so the clothing appears to be worn by an invisible body. Done well, it's one of the most efficient formats in e-commerce: clean, consistent, and entirely focused on the product.

It works especially well for structured pieces — jackets, blazers, tailored shirts, dresses — where shape and silhouette matter and a flat lay just won't cut it. The trade-off is that it requires precise shooting and skilled retouching to look seamless. Most brands doing this at volume work with studios that have the workflow dialed in, because inconsistencies across a large catalog are hard to fix retroactively.
Lifestyle Photography
Catalog shots answer the practical questions. Lifestyle shots answer the emotional one: can I see myself in this?
The best lifestyle content feels attainable, not aspirational to the point of alienation. Real settings, natural movement, models doing something believable rather than posing. This kind of imagery particularly resonates with younger shoppers who are quick to spot — and dismiss — anything that feels staged or inauthentic.

Paired with clean product photography, it creates a complete picture that addresses both the head and the gut. This breakdown on photography for marketing is worth reading if you're thinking through how the two approaches work together.
Flat Lay and Detail Shots
Flat lays are shot from directly overhead with the garment laid on a flat surface — great for showing outfit combinations, highlighting prints and patterns, and creating social content that feels native rather than polished-to-death.
.jpg)
Detail shots do something different: they answer the questions customers have but don't always ask out loud. Is the zipper quality? What does the stitching actually look like? Are the pockets real? Close-up images of:
- Fabric texture and weave
- Hardware — buttons, zippers, clasps
- Stitching and construction details
- Special features like linings, embellishments, or functional pockets
- Brand tags and care labels
...all reduce the uncertainty that kills conversions. This guide to types of e-commerce images is a useful reference for building out a complete image set for each SKU.
Post-Production: What It Actually Takes
Raw files don't go live. Post-production is where technically solid shots become polished, conversion-ready product images — and where a lot of brands either lose time or lose quality by cutting corners.
Color Correction and Consistency
Color accuracy isn't a nice-to-have — it's directly tied to your return rate. When a customer receives something that looks noticeably different from what they ordered online, trust breaks down fast. Professional color correction keeps what's on screen honest to what arrives at the door.
At scale — across hundreds or thousands of SKUs — consistency requires real process: color reference cards shot on set, calibrated monitors for editing, and brand-specific color profiles that keep every editor working from the same standard.
Retouching: What's Appropriate, What Isn't
Modern shoppers have good instincts for over-retouched imagery, and it backfires. Unrealistic visuals create unrealistic expectations, which drive returns and damage brand trust. Keep it honest.
Appropriate retouching covers:
- Removing lint, loose threads, and temporary imperfections
- Correcting minor wrinkles from handling and transport
- Standardizing background appearance across the catalog
- Adjusting exposure and color for accuracy
- Removing mannequin forms for ghost mannequin shots
What it shouldn't do: alter the garment's actual fit, shape, or construction. If it misleads the customer about what they're getting, it will cost you — in returns, in reviews, and in repeat business.
Integrating Photography Across Your Marketing Channels
Photography that only lives on your product pages is leaving value on the table. The strongest fashion brands treat their image library as a cross-channel asset and plan shoots accordingly.
Shoot for Every Channel, Not Just the PDP
Each channel has different format needs and different audience expectations. Instagram rewards visual cohesion and strong aesthetics. Email needs clear, unambiguous product shots. Pinterest skews toward styled outfits and contextual inspiration.
Planning for multi-channel use during the shoot itself — not as an afterthought — is what makes your budget go further. Practically, that means:
- Vertical formats for Stories and TikTok
- Horizontal frames for website banners and email headers
- Square crops for standard social feeds
Seasonal Planning and Content Calendars
Fashion runs on seasonal cycles, and your photography schedule has to stay ahead of them. A reactive approach — shooting when the product is already needed — leads to rushed shoots, inconsistent quality, and missed launch windows.
A workable fashion photography calendar typically looks like:
- Pre-season shoots (3–4 months out) for catalog and website preparation
- Launch campaign photography combining product and lifestyle content
- Mid-season refreshes for restocks and new colorways
- End-of-season clearance imagery focused on value and urgency
- Evergreen content for core year-round products
Squareshot's full-service photography solutions are built to handle this kind of multi-category, multi-season scheduling — so you're not trying to coordinate it all internally.
In-House vs. Studio: Making the Right Call
This is one of the bigger strategic decisions a growing fashion brand has to make, and the right answer depends on your volume, margins, and where your team's time is best spent.
Building In-House
If you're shooting constantly and have the margin to support it, building internal capabilities can make financial sense over time. Basic setups start around $5,000; professional studio builds run $50,000+. But equipment is only part of the cost. Factor in:
- Photographer, stylist, and retoucher salaries or day rates
- Dedicated studio space
- Ongoing training to maintain quality as standards evolve
- Software and hardware updates
- The learning curve — and what it costs in quality and time while you climb it
Even brands with strong in-house teams typically supplement with professional studios during peak seasons or for specialized work.
Partnering with a Studio
Specialized studios bring something that's genuinely hard to build from scratch: refined workflows, experienced teams, and consistency at scale. The equipment investment has already been made. The process is already optimized. You're paying for the output, not the overhead.
The per-image cost looks higher on a spreadsheet than in-house production. But factor in the total cost — equipment depreciation, personnel, opportunity cost of internal resources redirected away from core business — and the math often shifts. For brands thinking through essential techniques and tools for fashion e-commerce photography, partnering with an experienced studio is usually the faster path to quality while keeping your team focused on growth.
Measuring What's Working
Photography is an investment. Treat it like one — track the metrics that tell you whether it's paying off.
The KPIs That Matter
Conversion rate is the most direct signal. A/B test image styles against each other: lifestyle vs. white background, ghost mannequin vs. on-model. The data will tell you what your specific audience responds to, and it's often not what you'd assume.
Return rate is the other big one. Accurate, detailed photography sets realistic expectations — and realistic expectations mean fewer disappointed customers sending things back. That makes photography quality as much an operations investment as a marketing one.
Beyond those two, keep an eye on:
- Time on product page — a proxy for engagement and interest
- Image zoom frequency — signals that shoppers want more detail
- Social engagement on product posts
- CTR on image-driven ads
- Any customer feedback that references image quality directly
Keeping It Current
The strongest e-commerce photography programs treat image quality as a moving target, not a one-time project. Quarterly reviews of performance data should feed back into how you're approaching styling, lighting, and post-production — and what you plan to shoot differently next season.
This resource on e-commerce fashion photography benefits and techniques is useful for staying current as consumer preferences and platform algorithms continue to evolve.
E-commerce fashion photography is one of the few investments that touches almost every part of your business — conversion rates, return rates, brand perception, and customer trust. Getting it right isn't just a creative exercise; it's a commercial one. When you're ready to build a visual catalog that actually works as hard as the rest of your operation, Squareshot has the expertise and workflow to get you there.
Product A
SQUARE SHOT