Clothing photoshoots are essential for e-commerce brands looking to present their products clearly and consistently. High-quality images showcase fit, texture, and style, helping customers understand what they’re buying and reducing the number of returns. Whether you're shooting with models, mannequins, or flatlays, the right approach depends on your product and platform goals.
This guide outlines each stage of a clothing photoshoot, from planning and team coordination to lighting, posing, and post-production. You’ll learn how to prepare garments, select talent, and capture details that support your brand. It also covers editing tips and promotional strategies to maximize the value of each image.
Whether you shoot in-house or with a service like Squareshot, these tips help you build a workflow that delivers clean, sellable clothing photos.
Planning a Clothing Photoshoot
Organize your clothing photoshoot by preparing your items, setting goals, and choosing the right visual style. Knowing what you want and how to present your clothing makes the process smoother.
Defining Your Photoshoot Goals
Decide exactly what you want from your photoshoot. Are your images for product pages, social media, or a fashion blog? Each platform needs a different style.
If you want to show details, use clean backgrounds and sharp shots. For social media, use lifestyle or model shots that show your clothes in action. Set your goals early so you and the photographer know what to focus on.
Think about your audience and what will make your clothing stand out. Clear goals save time and help you get images that boost sales.
Selecting Clothing Items
Select clothing pieces that align with your goals and the narrative you want to convey. Pick items that are in season, on-trend, or bestsellers. Make sure each piece is clean and well-prepared.
Bring backups and variations of similar styles, colors, or fits to ensure a seamless transition. This gives you more options during the shoot.
Organize your items with labels or a list to speed up the shoot. Knowing exactly what you’re shooting keeps things efficient.
Creating a Mood Board
A mood board collects visual ideas and styles to guide the look and feel of your shoot. Add color palettes, lighting styles, and poses you want. This helps everyone understand your vision.
Use photos from magazines, Instagram, or previous shoots. Show your photographer and stylist your mood board to keep the creative process on track. A clear mood board gives your photos a consistent style, whether it’s bright and casual or dark and elegant.
For fast, studio-quality photos and flexible options, consider a professional e-commerce photo service. They offer clear pricing and quick turnaround to keep your project on schedule.
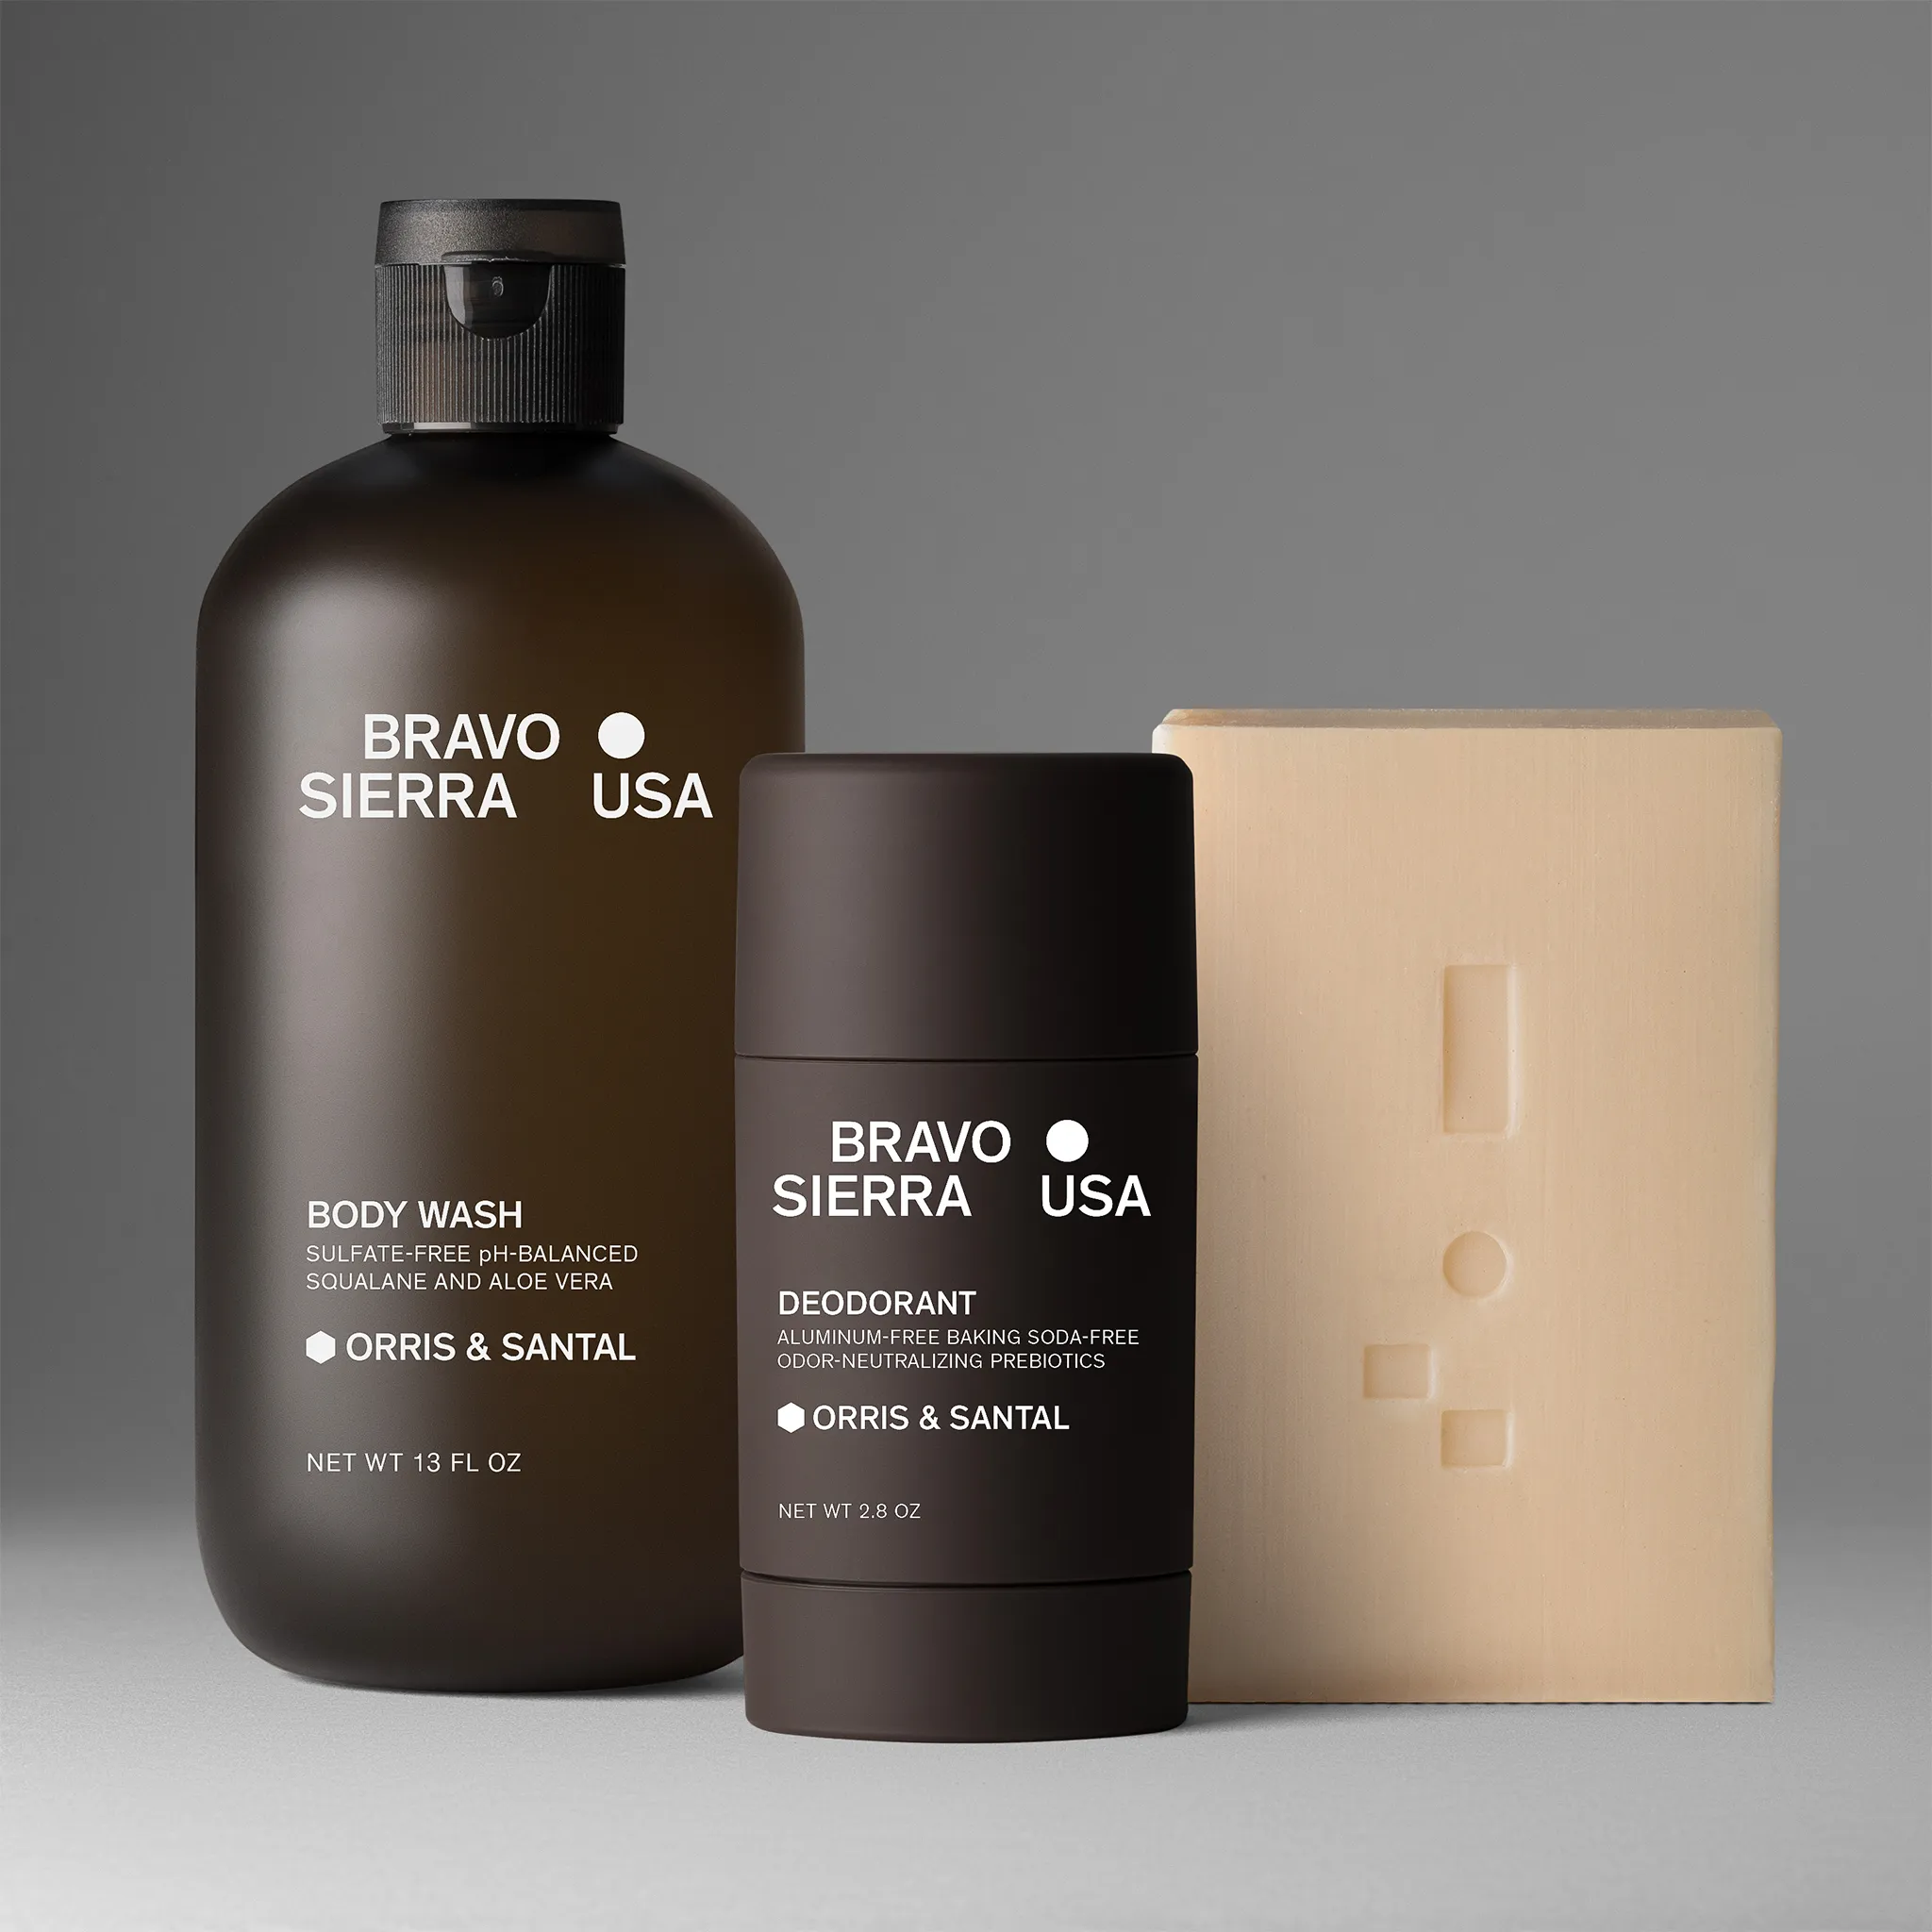
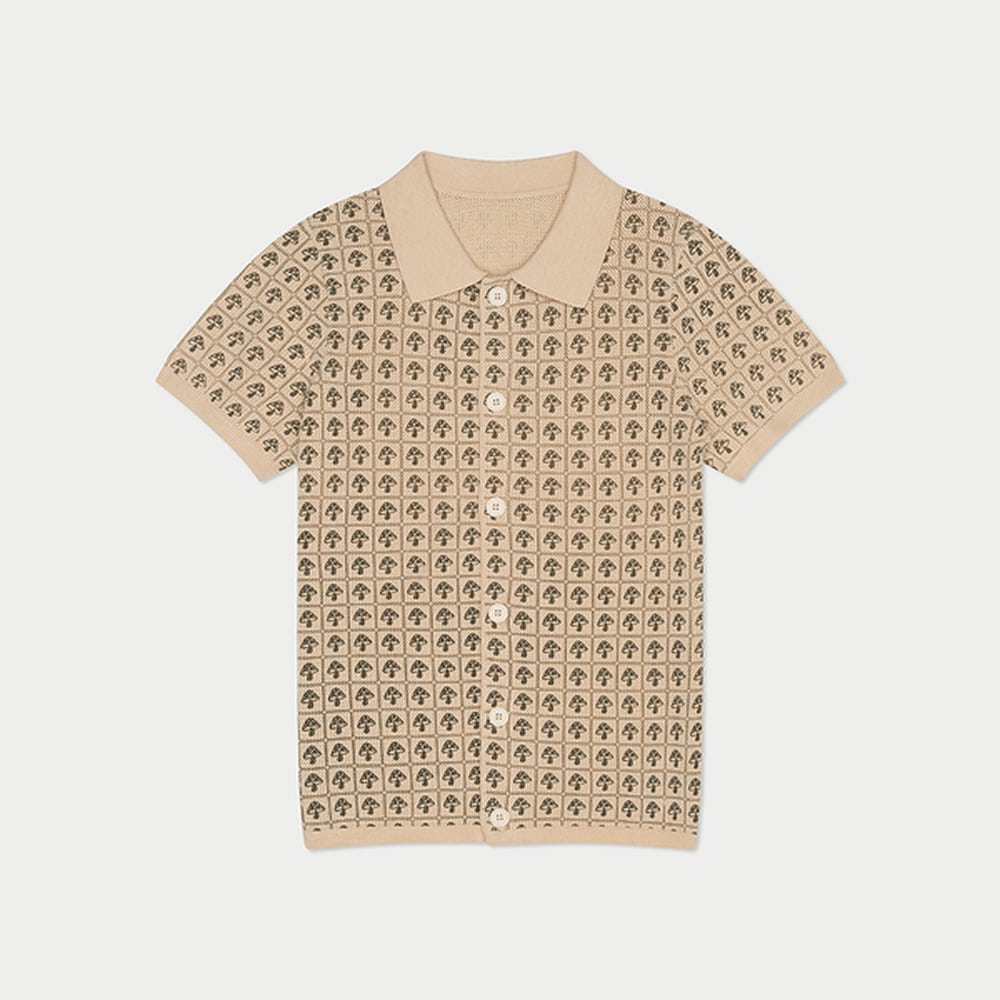
Clothing Photography Styles: Ghost, Flat Lay, and On-Model
Clothing photoshoots typically use three core formats, each with different benefits:
- Ghost mannequin photography creates a 3D shape by photographing garments on invisible forms, then editing out the mannequin. Ideal for structured clothing like jackets or shirts, it offers a retail-style view of fit.
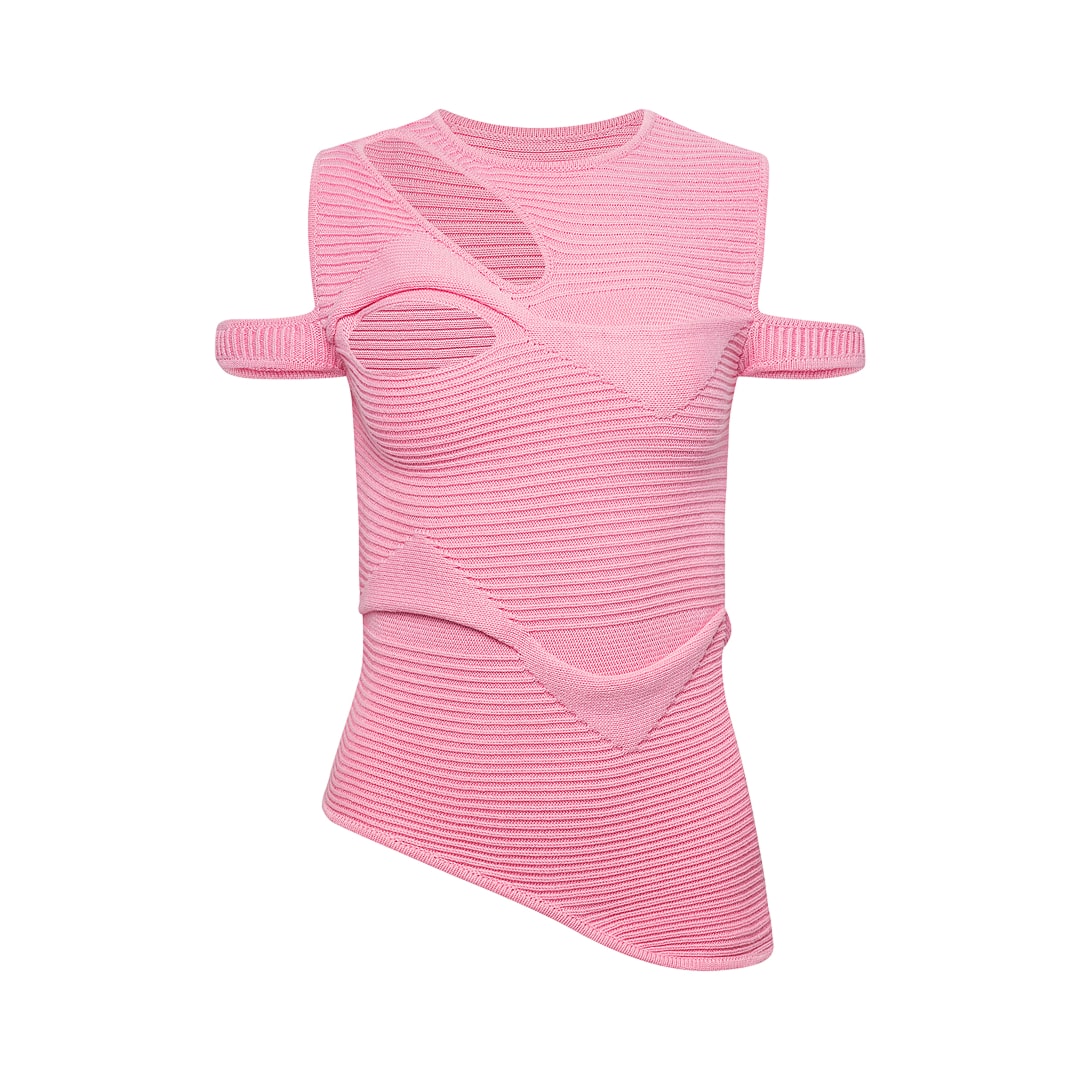
- Flat-lay photography shows clothing laid out on a surface. It works well for T-shirts, casual wear, and accessories. It’s fast, repeatable, and great for consistency.
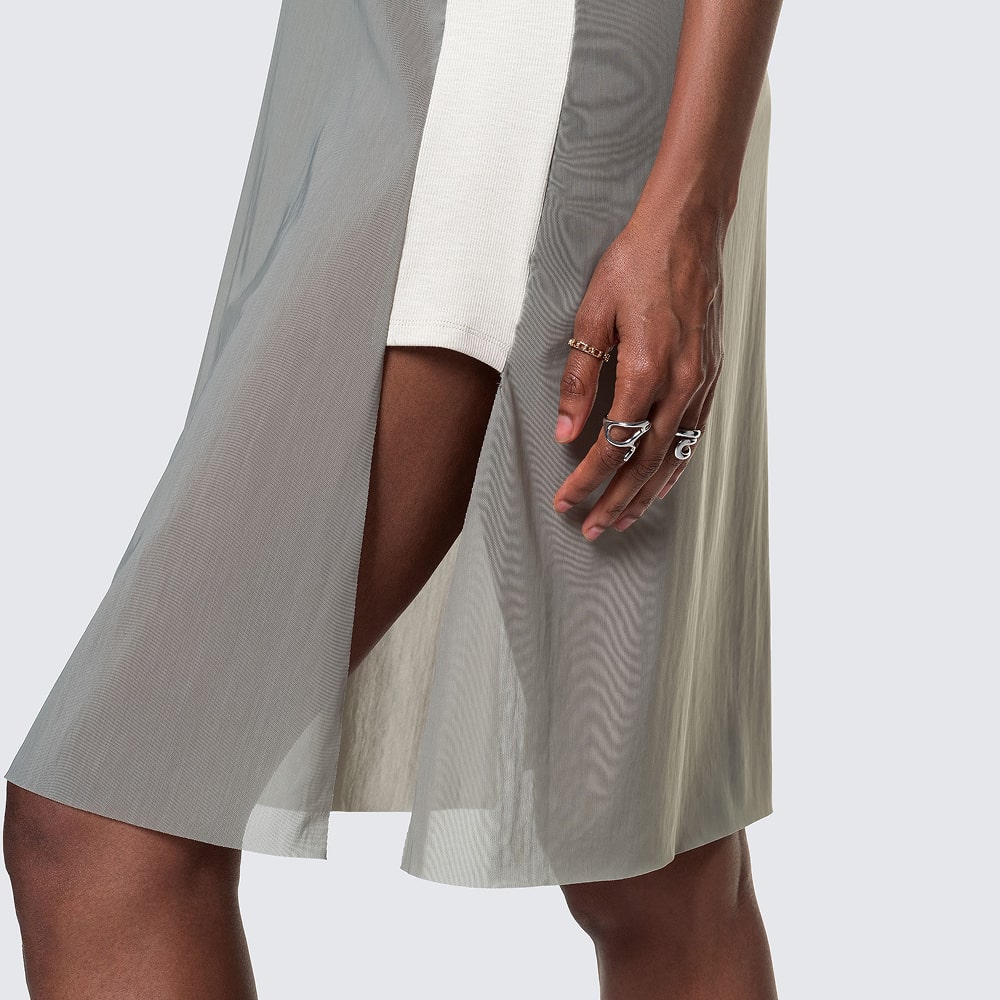
- On-model photography showcases garments on live models, helping buyers visualize fit, movement, and styling. Best for lifestyle and campaign imagery. Choosing the right style depends on your brand goals, budget, and catalog needs.
Organizing the Shoot Team
You need the right people for your clothing photoshoot. Every role matters, from models who represent your brand to stylists who perfect the look and photographers who capture the images. Clear communication and coordination ensure a smooth shoot.
Choosing Models for Your Brand
Pick models that match your brand’s style and target audience. Consider age, body type, and look to reflect your clothing line. If your brand is casual, use models with relaxed, natural poses. For high fashion, choose models with strong editorial experience.
Make sure models understand your brand’s message and the mood of the shoot. Confirm availability and contracts early. Booking diverse models helps you reach a wider audience. Review portfolios or request test shots before making your final choice.
Hiring Stylists and Makeup Artists
Stylists and makeup artists shape how your clothing looks on camera. A stylist selects accessories, outfits, and props that match your brand colors and themes. Discuss the mood, season, and story beforehand.
A good makeup artist enhances the model’s features without overpowering the clothing. For natural looks, simple makeup works best. For effective campaigns, consider using bold or creative makeup. Plan time for fittings and touch-ups during the shoot.
Coordinating Photographers and Assistants
Photographers bring their vision to life through the artful use of lighting, angles, and composition. Hire photographers who specialize in clothing product photography with experience in e-commerce or fashion. Discuss shot lists and style guides to maintain clear focus.
Assistants support the photographer by managing equipment, adjusting lighting, and helping with setup. Their help keeps the shoot on schedule. Ensure that everyone is aware of the timeline and their respective tasks. Using a trusted service makes coordination easier, as they provide experienced crews and smooth workflows.
Executing the Clothing Photoshoot
When your clothing photoshoot starts, focus on setting up the space, guiding your models, managing lighting, and capturing the details that sell your product. Attention in these areas helps you get clean, clear images that showcase your clothes.
Setting Up the Studio or Location
Select a location that aligns with your brand’s style, whether it’s a studio or an outdoor setting. Use a clean, simple backdrop to keep the focus on your clothing. Neutral colors or solid backgrounds work best for product clarity.
Arrange your equipment for easy access. Prepare racks or tables to keep extra outfit options nearby. If you are indoors, keep the space clutter-free and make sure your team and models can move safely.
Test your camera and equipment setup before your shoot day. Choose a service that offers flexible remote or in-studio options to help you organize efficiently.
Posing and Direction for Models
Give clear and simple directions to help your models showcase the clothing naturally. Use poses that highlight the fit and movement of the fabric. Ask models to walk, stretch, or fold their arms to show how the clothes fit in different positions.
Use reference images to guide your team. Give positive, specific feedback during the shoot. Encourage models to interact with the clothing, like adjusting collars or pockets, to emphasize details buyers care about.
For lifestyle shots, aim for authentic, relatable looks that connect with your audience. Choose a model photography service that includes styling and casting to make this easier.
Lighting Techniques for Apparel
Good lighting shows fabric textures and colors clearly. Use soft, even lighting to avoid harsh shadows that can hide details. Natural light works well, but control it with reflectors or diffusers.
For studio shoots, position multiple light sources around the product: a key light for main exposure, a fill light to soften shadows, and a backlight to separate clothing from the background. This setup gives you depth and clarity.
Avoid color casts that change how your product looks online. Set your camera’s white balance and use daylight bulbs when possible. Check images on a calibrated screen to keep color accurate.
Capturing Detail Shots
Close-up shots show fabrics, seams, buttons, and unique design features. Use a macro lens or zoom setting to capture these details. Plan shots for tags, stitching, textures, and any embellishments that make your product stand out. These shots build trust by showing quality craftsmanship.
Position your lighting to avoid reflections or glare on shiny fabrics and accessories. Use a tripod to keep close-ups sharp and steady. Include detail shots with your main photos to give customers a complete view of your products.
Post-Production and Showcasing
After your clothing photoshoot, focus on refining the images and selecting which ones to use. Plan how to share and promote your photos so they help sell your apparel.
Editing and Retouching Images
Edit your photos to sharpen them and fix minor flaws. Adjust brightness, contrast, and colors to match the true look of your clothes. Retouching removes wrinkles, fixes fabric creases, or removes dust or lint. Keep edits natural so the clothing looks realistic. For most qualified services, standard retouching ensures every image is clean and consistent. Complex changes, such as reshaping, can be added but may incur additional costs.
Selecting Final Images for Use
Pick images that clearly show the details customers want. Choose shots with good lighting and accurate colors. Include a mix of close-ups and complete outfits. Select images with different angles or styled looks to appeal to different shopping needs. Ensure the final photos align with the platforms you’ll use, such as your website, social media, or ads. Consistency across all images builds your brand identity.
Sharing and Promoting Photos
Once your photos are ready, plan how to use them to reach customers. Upload them to your online store with clear product descriptions. Use social media posts to show off new arrivals or styled outfits. Boost engagement by tagging your brand, running ads, or sharing behind-the-scenes shots. Email newsletters with fresh photos can encourage repeat sales. High-quality images help your products stand out and improve conversion rates. For more details on planning and managing product shoots, check out clothing photoshoot guides from experts.
Common Mistakes in Clothing Photoshoots and How to Avoid Them
Even with planning, avoidable errors can reduce image quality or increase editing time. Common mistakes include:
- Unprepared garments: Wrinkled or lint-covered pieces delay shoots and reduce trust.
- Inconsistent lighting: Changes in setup affect fabric tone and texture across items.
- Missing style guides: Without a clear brand reference, posing and styling may drift.
- Incorrect sizing on models: Ill-fitting clothing can distort brand perception.
To prevent these issues, confirm garment prep, lighting setups, and reference shots in advance. Structured shoots reduce reshoots and post-production work.
Building a Reliable Workflow for Clothing Photoshoots
Clothing photoshoots require more than just a camera and a backdrop. They demand coordination, technical precision, and visual consistency. Whether you're building a catalog or launching a seasonal campaign, a structured approach helps minimize errors and improve output.
From selecting models and prepping garments to managing lighting and capturing detail shots, every phase contributes to the clarity and appeal of your clothing images. Planning tools like shot lists and mood boards help align your team, while controlled lighting and consistent poses support batch production.
Working with professional teams, whether in-studio or remotely, adds reliability and efficiency. Services like Squareshot streamline each step, providing fast, catalog-ready visuals through a repeatable process. Explore pricing now.
Frequently Asked Questions
Planning a clothing photoshoot involves considering your theme, outfits, lighting, and how to effectively showcase the clothes. Knowing what to expect helps you prepare for models, locations, and the shoot’s details.
What are some creative ideas for clothing photoshoots?
Try lifestyle shots showing models wearing clothes in everyday settings. Use props that match your brand’s colors and style. Mix studio and outdoor shots to add variety.
Use various lighting styles, such as natural sunlight or soft studio lights, to establish the mood. Work with stylists or photographers to bring fresh ideas to your photoshoot.
How can I organize a photoshoot for my clothing brand?
Begin by defining your theme and the mood of your collection. Choose models who fit your brand and schedule fittings to ensure perfect clothing fit. Prepare props and backdrops that match your brand book.
Create a shot list to cover all product styles and details. You can also work with a professional service like Squareshot for flexible options, clear pricing, and fast delivery.
What are the best poses to showcase clothes in a photoshoot?
Use poses that highlight features such as fabric texture, fit, and detail. Standing straight with slight turns shows the garment’s shape. Movement shots can highlight flowy or stretchy fabrics.
Keep poses natural to make your clothes look wearable. Avoid awkward or stiff positions that distract from the product.
Can I do a professional clothing photoshoot at home?
Yes, with good lighting and a clean background, you can capture quality images at home. Use natural light from windows or softbox lights for even lighting. Ensure your camera or phone has a high resolution and shoot from multiple angles. Editing tools can help polish images to give them a professional look.
How much does it typically cost to do a clothing brand photoshoot?
Pricing varies depending on location, style, and number of products. At Squareshot, per-image pricing starts at around $50 for clothing, while hourly rates range from $750 for a quarter-day.
Full package shoots with models, styling, and retouching cost more but include all needed services. Membership plans can lower costs for regular shoots.
What should I consider when choosing outfits for a photoshoot?
Select pieces that align with your brand’s style and the shoot’s theme. Make sure clothes fit the models well by holding fittings before the shoot. Aim for variety while maintaining a cohesive overall look. Pay attention to color harmony, fabric types, and how each item appears under different lighting conditions.


Product A
SQUARE SHOT