In 2026, apparel imagery is evaluated in seconds. On product pages, shoppers rely on visuals to assess fit, texture, construction, and color accuracy before they ever read a description. That means a clothing photoshoot is no longer just a creative task — it’s a performance tool that directly impacts conversion, returns, and customer confidence.
This guide walks through the full production process from an e-commerce perspective. You’ll learn how to plan shoots efficiently, standardize visuals across SKUs, choose lighting setups that ensure color accuracy, and prepare images for online retail environments where clarity and consistency matter most.
Understanding What Defines High-Performing Apparel Photography in 2026
E-commerce apparel photography in 2026 is defined less by aesthetics and more by usability. The strongest product images are not the most stylized — they are the most informative. Shoppers expect to clearly understand how a garment fits, moves, and looks from every angle before purchasing.
Across successful online stores, three standards consistently separate high-performing imagery from average visuals:
- Consistency — identical framing and lighting across products
- Accuracy — true-to-life color and texture
- Comparability — visuals that allow side-by-side evaluation
Rather than focusing on trends, brands are prioritizing systems. Standardized angles, repeatable lighting setups, and structured shot lists ensure every product is documented clearly and efficiently. This approach reduces production friction while improving the customer’s decision-making experience.
In this environment, apparel photography is no longer just a visual asset. It functions as product information, and the clearer that information is, the more confident shoppers feel when purchasing.
Step 1: Planning Your Clothing Photoshoot
Planning is the foundation of every successful clothing photoshoot. Before you step in front of the lens, a thoughtful approach ensures your vision is clear, your team is prepared, and your shoot day runs smoothly. Let’s break down the essential steps to create visuals that truly represent your brand.
Defining Your Brand Photoshoot Goals and Brand Identity
Start with a crystal-clear purpose for your clothing photoshoot. Are you launching a new collection, updating PDP imagery, or standardizing visuals across your catalog? Define your goals early so every decision supports your brand image.
Align your shoot’s concept with your core values and your target audience. Use reference boards or style guides that define framing, lighting, angles, and cropping standards for your catalog.
Consistency is key — make sure your brand visuals match across your website and social media. If you want a step-by-step breakdown, check out this guide on planning a photo shoot for your clothing brand, which covers everything from concept to execution.
Before you move on, document your plan. Set clear objectives, note down must-have shots, and keep your brand’s personality front and center. This groundwork helps your clothing photoshoot stand out in a crowded market.
Assembling the Right Team and Resources
The right team brings your vision for your photoshoot to life. Identify essential roles:
- Photographer
- Stylist
- Model(s)
- Make-up artist
- Production assistant
Brands typically choose between three production approaches: in-house shooting, freelance teams, or specialized studios. The right option depends on volume, consistency requirements, and turnaround timelines. For growing catalogs or frequent launches, structured production workflows usually outperform ad-hoc setups.
Selecting the Best Date, Time, and Workflow
Timing can make or break a clothing photoshoot. Pick a date that works for your team and aligns with your campaign schedule. Consider the best time of day for natural light or book a studio with the lighting setup you need.
Think about seasonality and weather — outdoor shoots may require permits or backup plans if rain hits. Create a detailed shot list and production schedule, so everyone knows where to be and when. Build in time for wardrobe prep, set changes, and travel between locations.
Prepare for the unexpected. Have a backup location ready and ensure your workflow allows for quick pivots if challenges arise. Smooth logistics keep your clothing photoshoot on track and stress-free.
Pre-Shoot Checklist: What to Prepare
Preparation is everything for a seamless clothing photoshoot. Run through this checklist:
- Select and steam/iron all wardrobe pieces
- Gather accessories, props, and set design elements
- Schedule model fittings and take test shots
- Charge backup batteries and clear memory cards
- Double-check all equipment
Pack an emergency kit with safety pins, double-sided tape, and stain remover — wardrobe malfunctions are always a risk. Communicate the plan to your team before the shoot day. Clear roles and expectations mean everyone arrives ready, so your clothing photoshoot captures the best possible results.
Step 2: Styling for Success
Stepping up your styling game can make or break your clothing photoshoot. Every detail counts, from the perfect outfit to hair that holds up under studio lights. Whether you are shooting for a brand, influencer campaign, or personal project, nailing the look is essential for attention-grabbing results.
Choosing Outfits That Photograph Well
When selecting garments for a shoot, prioritize pieces that accurately represent fabric behavior on camera. Materials that wrinkle easily, reflect light strongly, or shift color under lighting may require additional preparation or testing. Structured fabrics highlight silhouette well, while fluid textiles benefit from movement shots that demonstrate drape.


Accessorizing for Impact
Keep balance in mind. If the outfit is bold, go subtle with accessories. If the look is simple, let statement pieces shine. When photographing multiple SKUs or variations, coordinate accessories to tie the looks together.
Accessories should only be included if they help clarify scale, styling context, or garment function. If they don’t add information, they introduce a distraction.
Hair and Makeup for Clothing E-commerce Shoots
In product-focused apparel photography, hair and makeup should support the garment rather than compete with it. Neutral, consistent styling keeps attention on fit and construction while ensuring visual continuity across SKUs.
Avoid overly dramatic looks or trends that may date images quickly. Instead, aim for clean, natural styling that remains consistent across products and sessions. This approach helps maintain catalog cohesion and prevents visual noise that could distract from the clothing itself.
Prepping Outfits and Avoiding Wardrobe Malfunctions
Preparation prevents panic on shoot day. Before your clothing photoshoot, steam or iron every garment. Use a lint roller for pet hair or dust, and check for loose threads or missing buttons.
Pack an emergency kit with:
- Safety pins for quick fixes
- Double-sided tape to secure necklines or hems
- Stain remover wipes
- Extra undergarments and socks
Fit each look on the model before the shoot. If quick changes are needed, lay out outfits in order and use labeled garment bags. Efficient prepping keeps the clothing photoshoot running on schedule and stress-free.
Inclusive and Adaptive Styling
Inclusive casting improves product clarity and relatability, helping shoppers better understand how garments fit different body types.
Showcasing real diversity and inclusion is a major trend in competitor content. It not only reflects the world we live in but also boosts engagement and authenticity in every clothing photoshoot.
Step 3: Mastering Poses, Expressions, and Movement
Capturing the perfect clothing photoshoot look is about more than just great outfits. Your poses, expressions, and movement bring the clothing to life, tell a story, and make every shot stand out. Whether you are a model, photographer, or brand owner, mastering these elements ensures every clothing photoshoot delivers conversion-focused results.
Posing Basics for Clothing Photoshoots
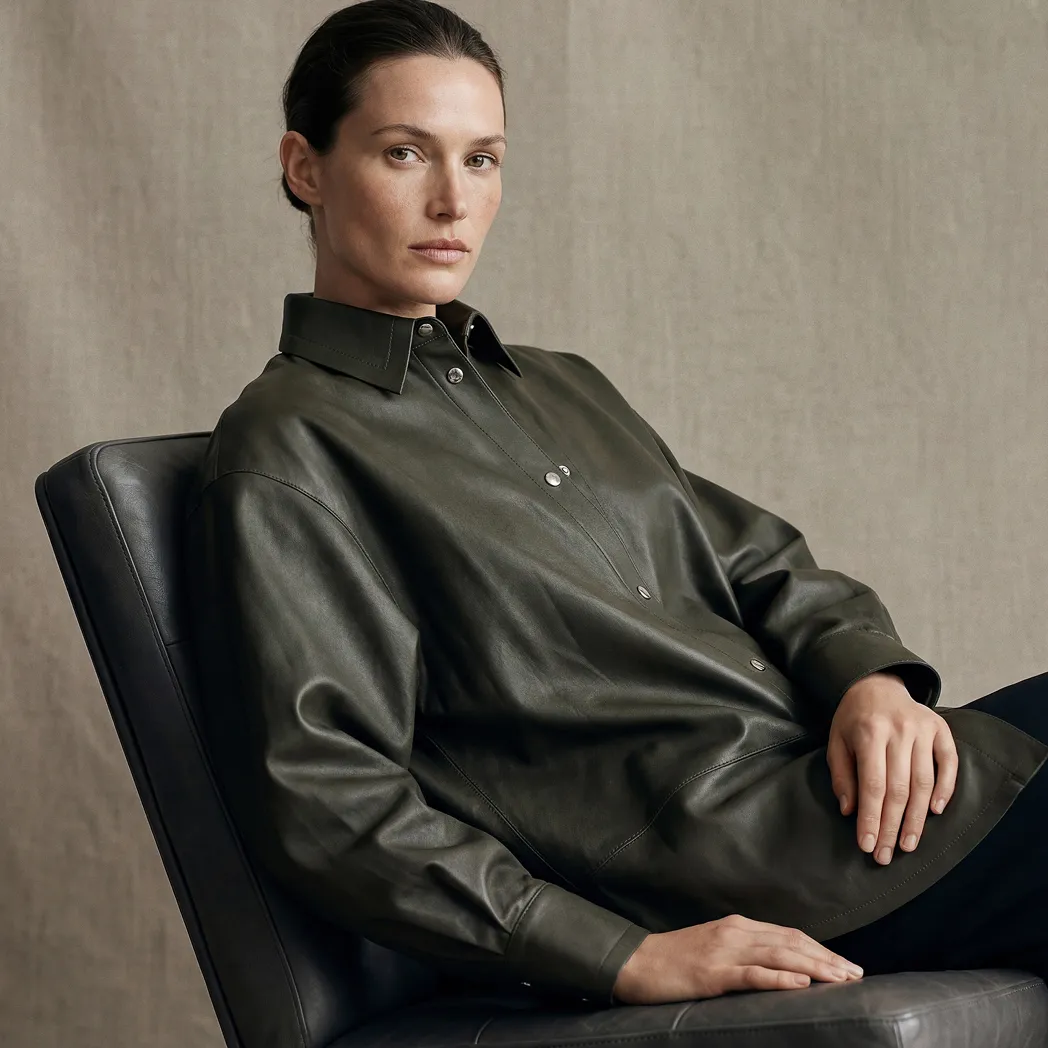
The foundation of every clothing photoshoot is strong posing. Start with classic poses that highlight your garments, such as standing tall, sitting with a relaxed posture, or walking naturally. Use angles to flatter body shapes and showcase details like pockets, sleeves, or unique stitching.
Hands play a key role — try holding a prop, gently touching the fabric, or adjusting an accessory to add interest. Avoid stiffness by encouraging models to shift weight, bend an arm, or slightly turn their head. Even subtle movement can make a clothing photoshoot feel fresh. For more creative inspiration and practical ideas, check out these clothing product photography ideas.
Expressing Emotion and Personality
In e-commerce clothing photography, it’s not the model’s personality that drives the image — it’s the product’s. The goal is to translate a garment’s character into clear, informative visuals that help shoppers understand how it looks, fits, and moves. Instead of directing emotional expressions, focus on styling, posture, and angles that reveal construction, texture, and silhouette. A slight turn of the torso, a relaxed arm position, or a structured stance can communicate more about a piece than any facial expression.
Pay close attention to details that guide purchasing decisions: how fabric drapes, how seams align, how closures sit, how sleeves fall from the back. Subtle adjustments — smoothing a fold, refining a pose, aligning hems — ensure the clothing remains the focal point. When executed well, these controlled, intentional visuals replace guesswork with clarity, making the product easier to evaluate and more compelling to buy.
Styling for Groups, Sets, and Individual SKUs in E-commerce
When photographing multiple products — whether coordinated sets, matching styles, or color variations — the priority shifts from interaction to clarity. Arrange garments at varied heights or angles only if it helps define the silhouette and proportion. Depth should serve structure, not distract from it. In coordinated collections, maintain consistency in posture and framing so shoppers can easily compare pieces without visual noise.
Props and set elements should be used sparingly and strategically. In most e-commerce contexts, clean backgrounds outperform styled environments because they reduce friction and keep attention on the product. If showing a tracksuit set, for example, use subtle stance variations to highlight how the pieces work together — how the jacket falls over the waistband, how the fabric gathers at the ankle — rather than emphasizing personality or narrative.
For individual product shots, consistency is key. Neutral poses, standardized angles, and repeatable framing build trust and make comparison intuitive. The goal is not to dramatize the moment but to document the garment accurately — so shoppers can evaluate fit, construction, and detail with confidence.
Showing Movement in E-commerce Imagery
In e-commerce photography, movement should clarify, not dramatize. Subtle actions — a step, a turn, a raised arm — reveal how fabric drapes, stretches, and sits on the body. Prioritize sharp frames when details matter, especially for seams, texture, and fit.
Use motion selectively for garments that benefit from it, such as flowing fabrics or layered pieces. The objective isn’t energy — it’s understanding. Movement should answer practical shopper questions and make the product easier to evaluate.
Step 4: Lighting, Location, and Set Design
Bringing your clothing photoshoot vision to life starts with nailing the lighting, choosing the right location, and designing a set that enhances your style. These elements work together to create images that clearly communicate garment structure, fit, and color accuracy. No matter your brand or budget, thoughtful planning in these areas will elevate your results.
Choosing the Right Setting: Studio vs. On-Location
In e-commerce photography, the location should support clarity first. A studio offers full control over lighting, color consistency, and repeatable framing — making it ideal for catalog, PDP, and comparison-driven imagery. Clean environments reduce distraction and keep the focus where it belongs: on the garment.
On-location shoots can add context, but they must remain controlled. Natural light, urban settings, or lifestyle interiors work best when they enhance scale or usage without overpowering the product. Every background choice should serve a purpose — highlighting fit, fabric, or intended environment.
Ultimately, the setting isn’t about atmosphere; it’s about alignment. Choose the environment that reinforces your brand standards, maintains visual consistency, and supports conversion-focused imagery.
Lighting for Accurate Product Representation
In e-commerce photography, lighting isn’t about mood — it’s about precision. Consistent, diffused light ensures colors render accurately, textures remain visible, and garments look true to life across every frame. Studio setups with soft, even lighting are typically the most reliable for PDP and catalog imagery, as they eliminate harsh shadows and prevent color distortion. Always test lighting against the actual product to confirm tone accuracy and detail visibility before shooting.
Backgrounds and Set Choices
Set design should support product clarity, not compete with it. Clean, neutral backgrounds remain the standard for e-commerce because they reduce distraction and make comparison easier for shoppers. When variation is needed — for example, to show scale or context — keep props minimal and intentional so the garment remains the focal point. Every visual element should justify its presence by helping communicate fit, structure, or material.
Color Consistency and Visual Cohesion
Color accuracy is critical for online retail. Backgrounds, styling elements, and lighting should all be selected with one goal: ensuring the garment’s true color is clearly communicated. Neutral environments often perform best because they prevent color casts and maintain consistency across product lines. When working with multiple items or variations, standardized setups allow customers to compare options confidently — which ultimately supports trust and conversion.
Step 5: Post-Production and Showcasing Your Photos
You have wrapped your clothing photoshoot, but post-production is where accuracy and consistency are finalized.
This step transforms raw images into polished, scroll-stopping visuals that tell your brand’s story. Let’s break down the essentials so your photos shine everywhere they appear.
Selecting and Editing the Best Shots
After every clothing photoshoot, review all your images first. Look for sharpness, variety in poses, and frames that clearly show garment structure and fit. Use a culling process to eliminate duplicates or shots with closed eyes, odd angles, or distractions.
Create a shortlist of images that best highlight your clothing, styling, and model expressions. Edit these selections for color balance, contrast, and brightness. Always maintain natural skin tones and the integrity of the clothing’s fabric texture. Avoid over-editing, as authenticity is a major trend for 2026.
A simple editing workflow keeps your clothing photoshoot visuals fresh, authentic, and on-brand.
Advanced Retouching and Creative Effects
Now, take your clothing photoshoot images to the next level with advanced retouching. Remove background distractions, smooth out wrinkles in garments, and clean up any stray hairs or blemishes. Use tools like frequency separation for skin and fabric, and keep edits focused on accuracy — correcting color, removing distractions, and ensuring consistency across images.
Outsourcing can save time and deliver high-impact results, especially for large campaigns.
Choose retouching software that suits your workflow, whether it’s Adobe Lightroom, Capture One, or something new on the market for 2026. Thoughtful retouching elevates your clothing photoshoot and makes each image stand out.
Optimizing Images for Digital Platforms
Before sharing your clothing photoshoot online, optimize every image for web, social, and print. Size photos for fast loading, compress files to maintain quality, and use the right formats (JPEG, PNG, or WebP). Rename files with descriptive keywords and add alt tags for SEO.
Each platform has unique requirements. Instagram loves square or vertical crops, Pinterest favors tall images, and websites need high-resolution, fast-loading visuals. For a detailed guide on capturing and preparing apparel visuals, check out how to photograph clothing for your online store.
A well-optimized clothing photoshoot boosts engagement, brings out garment details, and ensures your images look professional everywhere.
Building a Cohesive Portfolio or Campaign
Finally, arrange your clothing photoshoot images into a cohesive portfolio, lookbook, or campaign. Start by grouping images by color, style, or story sequence. Consistency is key—use similar editing styles and color grading for all photos in one collection.
Arrange images in a logical order that helps shoppers evaluate the product — typically front, back, side, detail, and close-up views. For social media, plan your grid or carousel to highlight outfit changes, behind-the-scenes moments, and hero images. Include customer or influencer content for added authenticity and social proof.
A strong, cohesive campaign from your clothing photoshoot not only impresses potential clients, but also strengthens your brand identity for 2026.
Structuring Apparel Image Sets for Maximum Clarity
Instead of prioritizing concepts or themes, high-performing apparel shoots focus on structured image sets. A standard sequence helps shoppers quickly understand each product and compare options without confusion.
A strong apparel image set typically includes:
- Front view
- Back view
- Side angle
- Detail close-ups
- Texture or fabric shot
- Movement shot (if relevant)
This systematic approach improves usability, reduces uncertainty, and shortens decision time. When shoppers can clearly see how a garment looks and fits, they are more likely to purchase with confidence.
You’ve made it through the ultimate clothing photoshoot guide for 2026 — now you’re ready to turn those fresh ideas and trends into high-performing product imagery. Whether you want to showcase your brand’s unique style, highlight new collections, or create visuals that truly pop online, having a professional team can make all the difference.
If you’re excited to bring your vision to life and want every detail handled with care — from creative planning to flawless retouching — why not take the next step?
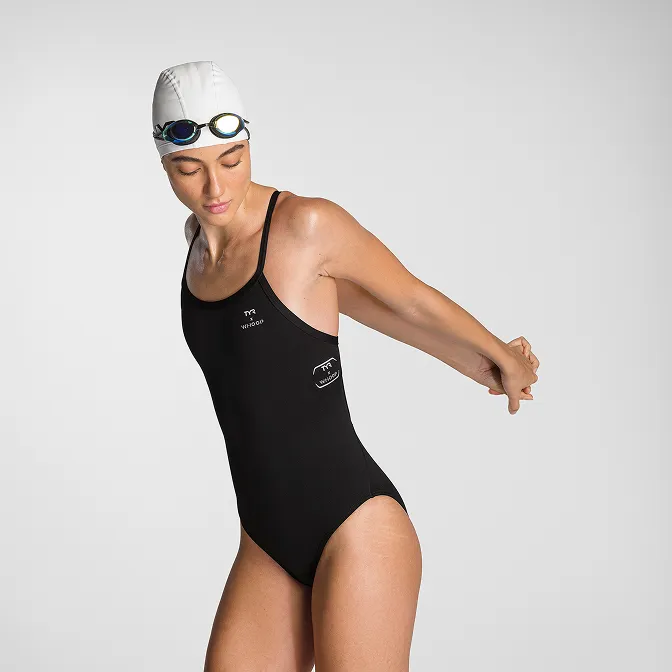
Product A
SQUARE SHOT