


If you’re choosing a Shopify ecommerce platform for your online store, you are now joining 1 000 000+ savvy merchants, who chose this user-friendly service! No surprise: this leading ecommerce solution takes care of all the operational and technical issues, like website design, payment integration, hosting services, email marketing.
The one thing they do not provide or help with – product photographs, so you need to figure out by yourself how to create seamless product images for your Shopify. Once you have spent all those resources designing and manufacturing your products, there is no other option, but to make sure your masterpieces are showcased properly.
Quite honestly, speaking from our experience in the product photography:
It’s common knowledge in the ecommerce realm, that product photos are one major conversion factor:
- if nicely executed, product images turn passersby into buyers;
- if poorly done, product photos will bury your business before it even begins.
How do quality photos affect sales?
Quality product images were proven in multiple research to have a direct correlation onto the conversion rate, return rate, checkout abandonment, and many more ecommerce-vital KPIs, like customer loyalty and brand awareness.
Some facts on how product images increase the conversion of the online store:
- Massive 90% of online shoppers rely on product imagery when making a purchase decision. (And that’s Shopify, who says so)
- Shotfarm reports, that 28% of respondents reported abandoned carts due to missing or inaccurate product images.
- 57% of the consumers will abandon a cart if the wait time exceeds 3 seconds – page loading speed depends (a lot) on the size of the images as well as the file format they are saved in.
- Almost half – 46% - of the 2,4K respondents in a survey by Stanford Technology lab mentioned website design as the number one credibility factor. Needless to say, blurred product images will harm even the most pixel-perfect Shopify store.
- 78% of online shoppers - the highest percentage of all options, mentioned they want to see product imagery in a store. After all, this is logical: how else can your shoppers check out and appreciate your products, if not by looking at your product shots?

The importance of high-quality product imagery in ecommerce is as much of an expectation nowadays, as a Wi-Fi in a café:
If it’s there – you take it for granted. If it’s not – you get up and go, however delicious the coffee is.
Preparation for shooting
The product photoshoot is a mission one has to plan thoroughly to reduce the cost of such. Everything about DIY photography/creating a studio is costly: the equipment, the studio rental, the talent, the post-production.
To get top results and bottom costs – research and plan:
- A venue for the shoot: outdoor, indoor, rented or at your home, professional or hand-made. Decide on the best one for your needs and budgets.
- Equipment for your shoot: everything matters from the background choice, lighting, camera to the tripod. You don't need to buy all that – renting may be an option, the pro equipment costs insane amounts of money that no starting business can afford.
- Talent – try to stay away from luxurious studios with pay-per-shooting time product photography pricing – you could shoot all day and not get the result you needed. Plus there is a cost for retouching.
On a small volume the most effective is to outsource the shooting on a price-per-image basis to a professional product photography company – and yes, we dare to use us as a reference, because we are proud of our work results:)
As an alternative – you could look for talented freelancers who are just starting – they may be available at a fraction of a usual product photography cost to fill their portfolio. Still be highly aware, there is some risk of rookie mistakes, of course.
- List of products to be shot. Have it categorized, think of the prep items needed after unpacking, sort them in order of the shoot.
The above is just a tiny portion of the things to remember to plan before the product photo session. To not miss any detail – check our article on how to get prepared for a clothing photoshoot.
The main thing: planning is essential for the success of the mission and cost-saving. Do not neglect it.
Product photography equipment you’ll need
For a basic DIY product photo session you may get away with the minimal supply of the photo equipment. This is if you are determined to try and minimize your costs of course. Not the cost center we recommend saving upon – your one product shot will try to sell your product to all the audience that’s about to check your online store, so you better get it to be good enough.
But – we have all been there – when you just getting started you need to be smart about costs, and ecommerce photography rates
in this case may seem too high.
Make sure to rent / buy / borrow / ask your freelancer to get / steal [just kidding]:
- Camera
- Tripod
- Lighting
- White bounce board
- White Background
- Table or floor to shoot against
- Tape to fix things in place
In case if you’re trying to DIY / outsource to a freelancer. Professional services have all of that inside their studio already, so not that much hassle here.
How to shoot items for an online store
Well, boiling down this topic to a couple of paragraphs is harsh, but we’ll try to fit our 10+ year experience in it for you! There are multiple resources & best practices on how to prepare for a product photoshoot and the tips for best results. We will only highlight here some major learnings:
- Do make sure to take a few angles of your products. A quantity of 3-5 shots at minimum is likely to give enough answers to onlookers so that to convert them to buyers. Note, that the higher product price – the more shots you may need.
Remember, the main mission of the product image is to come as close as possible to fulfill all the functions of the brick and mortar shopping experience. After looking at your images, customers must feel as though they touched the texture of the item with their fingertips, had a close look at the orderly line of stitches and nearly smelled the bitter-sweet vanilla-cocoa scent of the candles.
- Play around with lighting and light reflectors until you are happy with the resulting image on the camera screen – and on the desktop. You are looking for the best color-true shot possible. The closer it will be – the less you’ll pay to a freelancer for retouching afterward.
- Make sure your item is in focus without blurry areas. There is nothing worse than finishing the shoot only to realize the focus was not up the par when looking closely on the computer. Zoom in on the resulting image after the first image is taken, to make sure the focus is on and you are happy with the clarity.
How to retouch an image
If you took care of the light and focus during the shoot, your images should require only minimum retouching. But the stage is still crucial to the professional look of the product images.
When your Photoshop skills allow you to DIY your image retouching – this is great. But if you are looking to outsource the editing of the imagery, then your options are as follows:
- Freelance photo editors start with 2-3 dollars per image, the quality here will vary depending on the experience. So choose wisely.
- Photo retouching software is getting better by the day but definitely cannot compete with human talent yet. The pricing starts at $1,5, but there is a minimum spend attached to the deal. Choose carefully, an algorithm, even a pretty smart one, still can not get a sense of taste and understand you completely, so you won’t always get the result you expected.
- Professional photography studio, charging $ per image. At Squareshot we also provide just editing when needed, with a special e-commerce photography pricing. We charge based on how complex the work is. This way, we won’t ask our client with a nice plain T-shirt to pay as high as needed for retouching a multi-layered, reflective and shining complex jewelry piece. An here's alittle before/after for one of our clients:

Optimizing images for your Shopify store
If you are dead serious about your Shopify store loading speed, bounce rate, and user experience, go ahead and treat yourself to a complete guide on product image optimization. The main 4 tips we have covered in this topic, are:
- Use the best file format – in most cases, it’s a JPEG, suggested by Shopify.
- Use the size, which: will ensure great resolution but be as light as possible. Shopify advises keeping shots in a 2048 x 2048 px size for best optimization.
- Make sure your images are shot in the tone of voice of your brand – so they stand out from competitors, speak to the emotion and nurture client loyalty.
- Work on your alt text, caption, and description – so that Google can see your images and suggest for shoppers looking to buy the exact product you have.
Shopify Apps for Product Photography
There are a few apps related to all stages of photography available to Shopify store owners: from apps, that cater to ready-made images for decorative purposes, to ones that deal with retouching or providing funky filters.
The filter apps are a great help for those who have a thematic shop, that allows them to use one of such filters as the unique brand identity feature.
Cropping and resizing apps are too good for one job only and may be used to carry out those specific functions.
The retouching apps may be a good solution for personal use, as they are, after all based on algorithms and don't distinguish all the nuance, like humans do.
We loved and recommend you check out the exhaustive overview of the Product photography App domain by pixc. The one App, that has been specifically developed for ecommerce is Product camera, which takes out background automatically and softens shadow and improves focus as you go.
Squareshot allowed ordering professional product photography service just in the comfort of your store, and export final images (even when there are hundreds!) in a few clicks with this product imagery App.
This app is designed to understand your product photography needs, to streamline the process, and to systemize it. At the end, no more hours of categorizing and uploading photographs to your Shopify store – export final shots in minutes! Just like that:
.png)
17 secrets for great product photos for your Shopify store
- Invest in a quality camera and lenses
Right, this is free advice, yet its implementation is pretty pricey. What we are saying, is that the image's quality comes from the light, the professionalism of the photographer and editor. But the camera and lenses make a huge difference to start with.
If we were to approach the mission for the first time and needed to cater for the photography needs for quite some time, we would: research the below questions in detail:
Nikon vs Canon debate is as never-ending as that of the Cola and Pepsi. Is an entry-level DSLR enough for the mission? What lenses do I choose for product photography?
- Proper camera set up
You might want to turn off your flash settings and set the white balance to auto mode (AWB). ISO settings are best in the lowest available to reduce the noise – so ISO 100 should work fine. Check one of our works below: the photo is crispy clear, that’s the result you’re looking for:
- Table set up
One of the main intricacies of the table set up is placing it towards all the sources of light – be it a natural one or an artificial one, as well as making sure all the backgrounds and reflectors are placed in a way, that is fixed and well-positioned towards the light and model.
- Use window light
Being placed closer to the window or a source of natural light is a good idea, the 2 things to take into account will be avoiding the shadows of the window frame and placing the table at an angle of 70-110 degrees to the window.
We would recommend switching off all lights in the room but the professional ones. A regular room lamp may bring in the undesired shadows and bleaks into the picture.
- Ensure perfectly centered product set up.
Tweaking the product until it stands on its own perfectly may take some time, but this is still nothing compared to tweaking the imperfections during the retouching stage. Make sure everything is perfectly centered or upstanding to minimize re-takes and retouching workload.
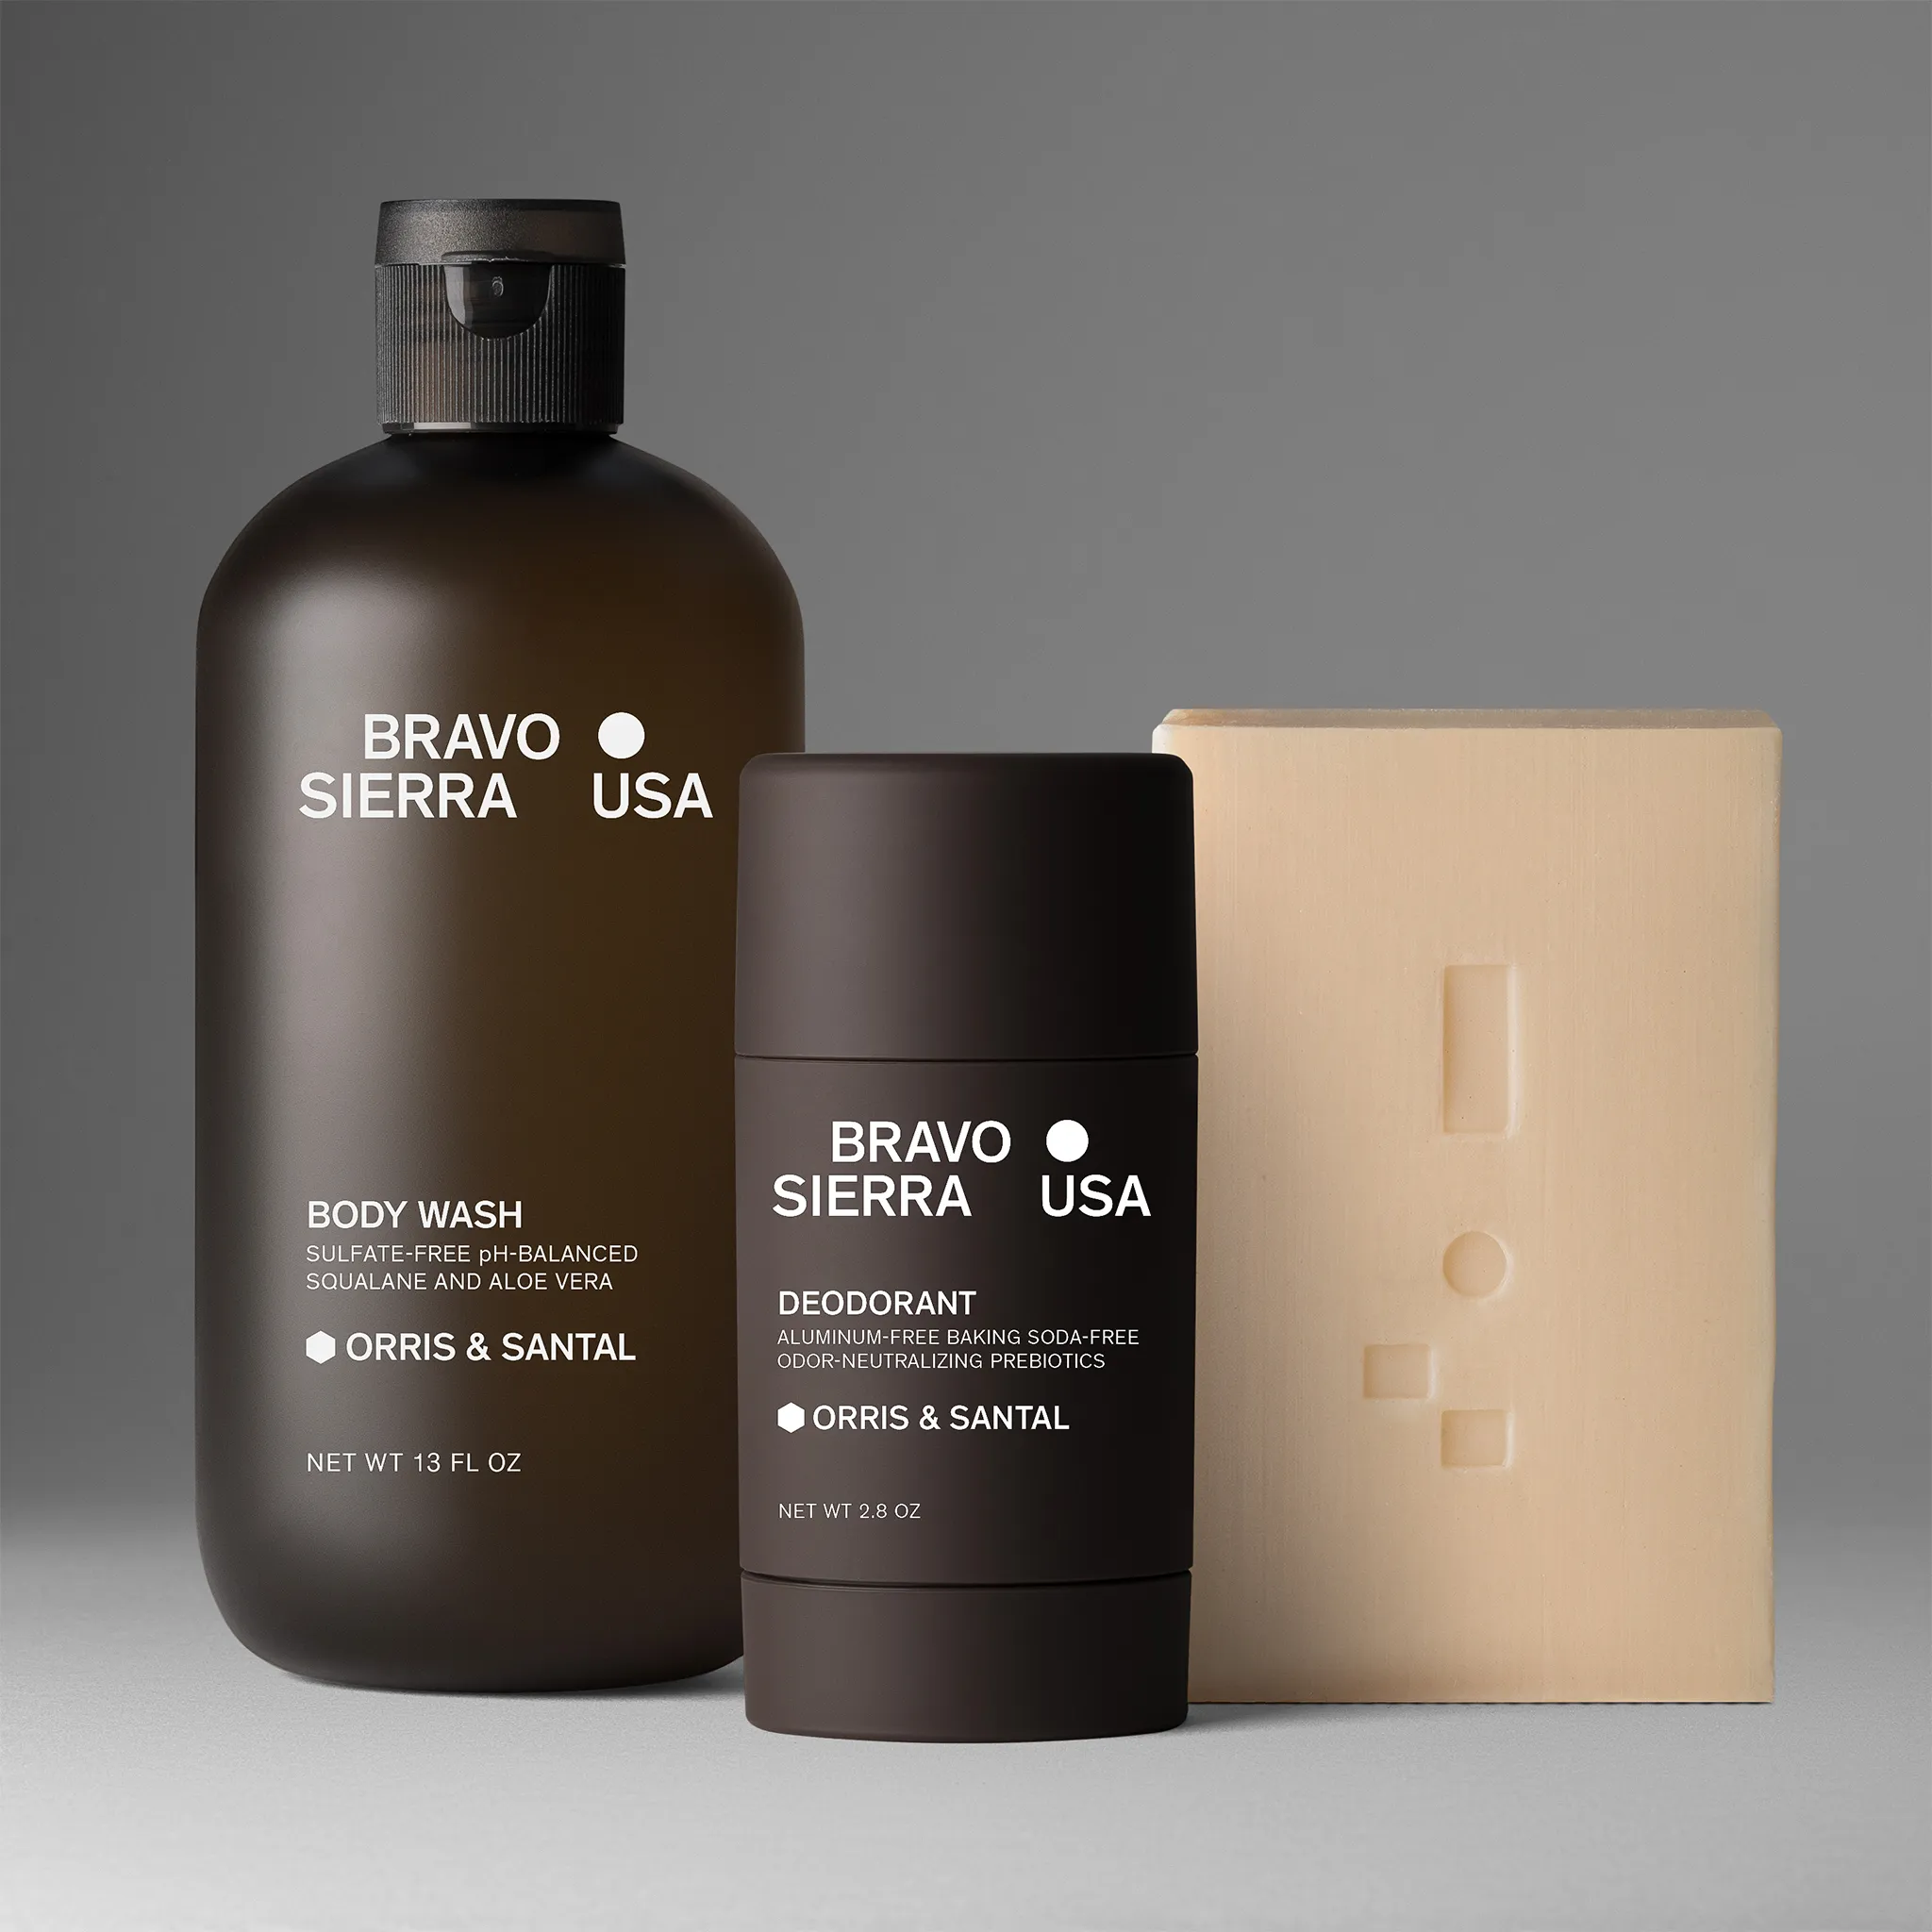
- Shoot product photos on white background
First off, it's simply classy and will make your photos good to go not only for the Shopify store but also for Amazon and any other marketplace there is.
Why? You compete for a user's attention all the time. Even on your product page, your product images are competing with texts and buttons and videos – you don't want to overcrowd it with too many colors & gradients at the back. Yes, social media photography is different that way. When the lightning is right, you can clearly see you white items against your white background, see how we did it for one of our clients:
- Setting up a board reflector
A regular big white piece of paper or a professional bounce card can be used to reflect the light for best product photography results.
You may want to experiment with the setup to see how the reflector interacts with every subject.
- Use a tripod
Tripod, just like a bounce card, will not make you consider living off one kidney, so if you do feel like you are in the ecommerce for some time, this investment might be a good idea. 20-30$ tripod options on Amazon should work just fine.
The tripod is needed for 2 major reasons:
- to ensure consistency of the series of images – you won't be able to hold the camera in the exact same position for a series of few shots, leave alone for a series of dozes and hundreds of shots.
- to avoid the blurry effect, that is highly likely to appear when hand-holding a camera, on the slow shutter speed.
[OK, we appreciate it does get too technical, but there is no way to sugar-coat this process or make it seem easier for a rookie. At this point, you may understand, why hiring somebody may be the best way after all].
- Avoid using filters
As you are trying to get the most true-to-life version of the product in your picture, using a filter is not a good idea.
In case you might need some for your social media later, you might apply them in Photoshop (or with any other app).
- Have images for all product styles
Keep in mind, you need to get as close as you can to create a feeling of a brick and mortar shopping experience via product photos. Take multiple shots at different angles with all possible layouts.
The more a user can feel the item, the bigger the understanding and connection are there to serve as stimuli for the purchase.
- Choosing the right shooting technique
You might need a few takes before you get the right angle, adjust the light, place the reflector card right, and the background looks perfect. In the best-case scenario, you will be able to also check your best image on the big screen to pick up the faults, that are too tiny to be seen on your camera.
- Light game & quality lighting
Needless to say, light is to a product image as acting is to a film. The script can be dynamic, full of nuance, the dialogues may be brilliant and sparkling with humor, but if the acting is poor, the film is still mediocre at best.
Similarly, lighting is one of the most important factors that differ a great image from a so-so one.
Brush up your lighting theory by watching a couple of YouTube vids make sure you stock with background and board reflector, consider using a flash diffuser too.
- Use a ‘Macro’ setting for finer visual nuances
The smaller the object, the more likely a photographer is to take a macro photo of it.
And, the more expensive the product, the more likely a photographer is to take a macro photo of it.
Indeed, the jewelry product photography is all about macro shots. Similarly, if you are doing a shooting for lux items, the probability is, that you will zoom in on stitching and small details: first, you need lots of images for premium items, second, you need to showcase the quality.
- Use a Flash Diffuser
One of the pieces of equipment that may be considered as optional for DIY product photography sessions, but still add so much level to the lighting.
A diffuser will make the flash softer and less concentrated and hash.
- Edit and Retouch Your Images
However much prep went into your product photography session.
However clean, ironed out, spotless your model objects are.
However great your lighting is set.
However sharp your focus may be.
You still need to touch up your resulting images. And yes, by doing everything by the book during the session itself, you absolutely can minimize the expensive retouching part significantly.
Choosing product photography services for Shopify
Those are just a few major tips on how to make sure your Shopify product photos are professionally-looking, even though you may choose to DIY them initially.
As a professional photo company with over a decade of experience, we can always spot DIY product photography, still to be honest, we have seen some pretty good attempts too. Not too often, though. By following this guide with product photography techniques your chances of producing a good result increase exponentially.
Product photography is the investment with one of the highest ROIs out there in the ecommerce business.
Our Shopify app
Squareshot professional product photography studio has the offer you cannot refuse: we will make a free trial images so that you can appreciate how your item looks through our lenses with no strings attached and no bill to pick up.
And that's for any category you have. Do you want to start right now? Just click here, and we'll get you your fresh and clean product images.
_1_(button)_8%2520(5).png)
If you own a Shopify online store, and want to try all the features – get our app here. And let us know how you liked it!


Product A
SQUARE SHOT
.png)


